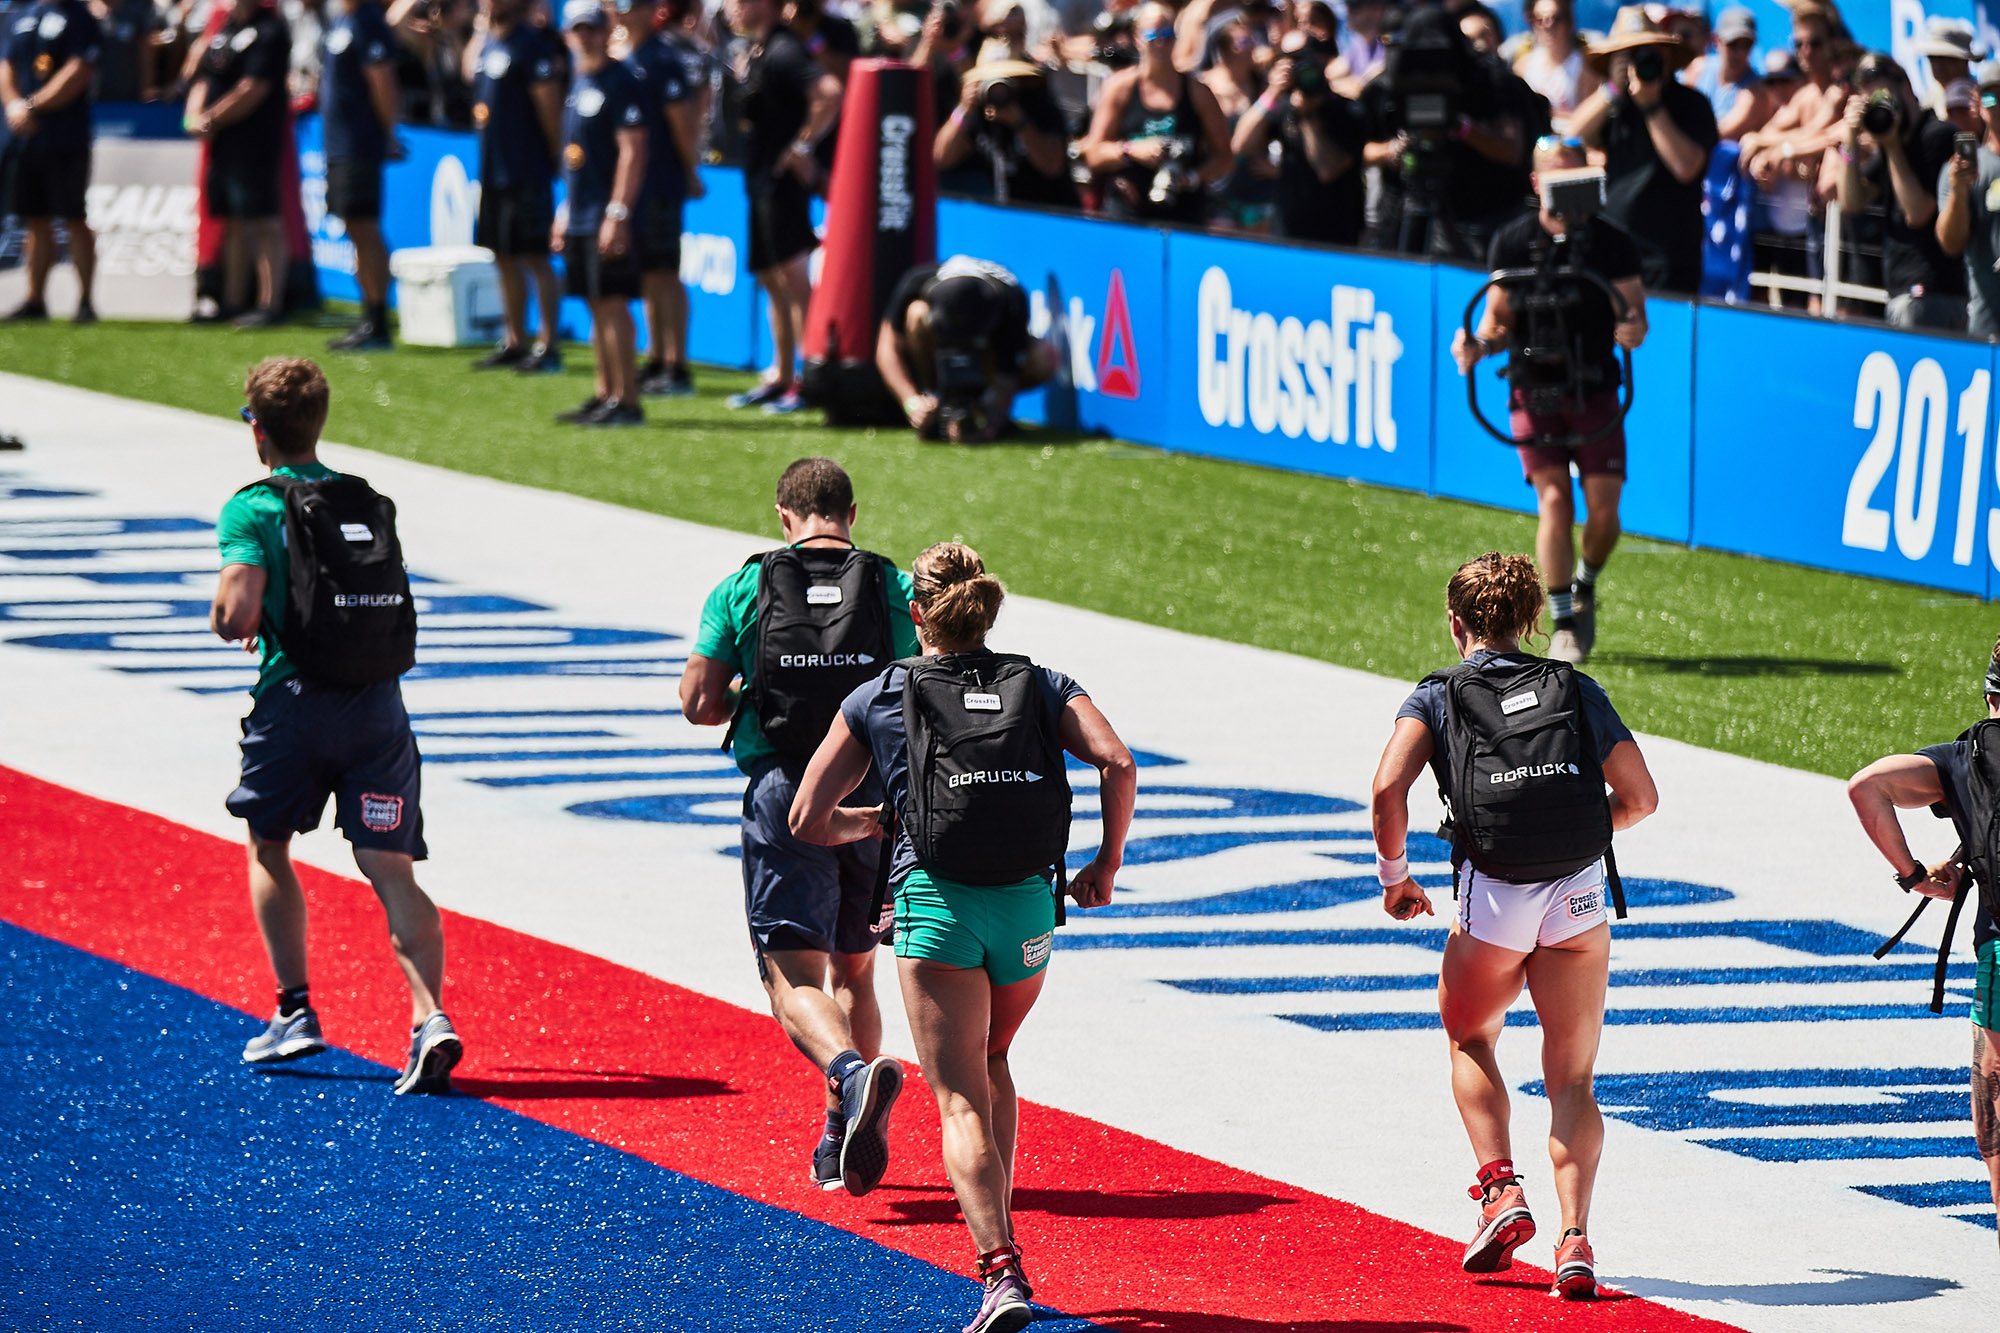
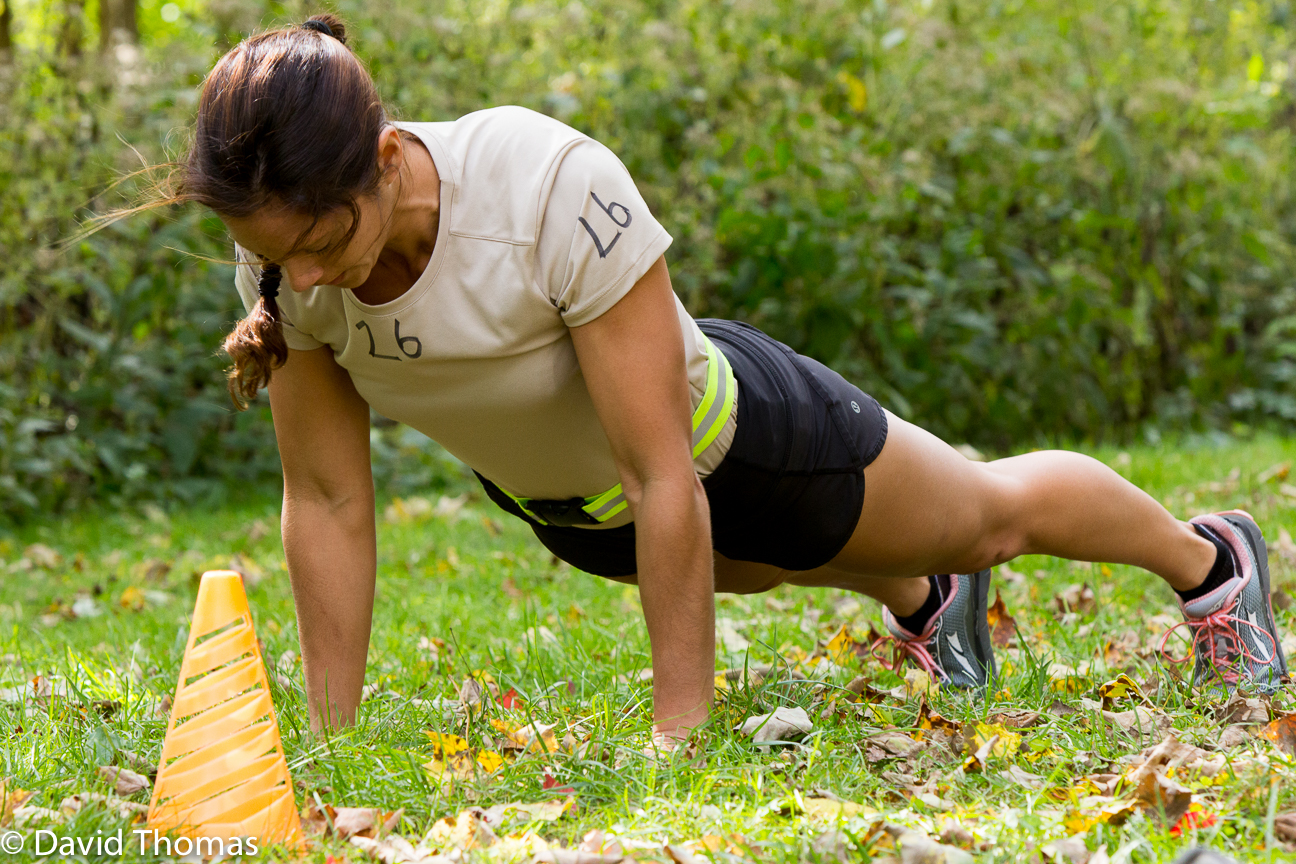
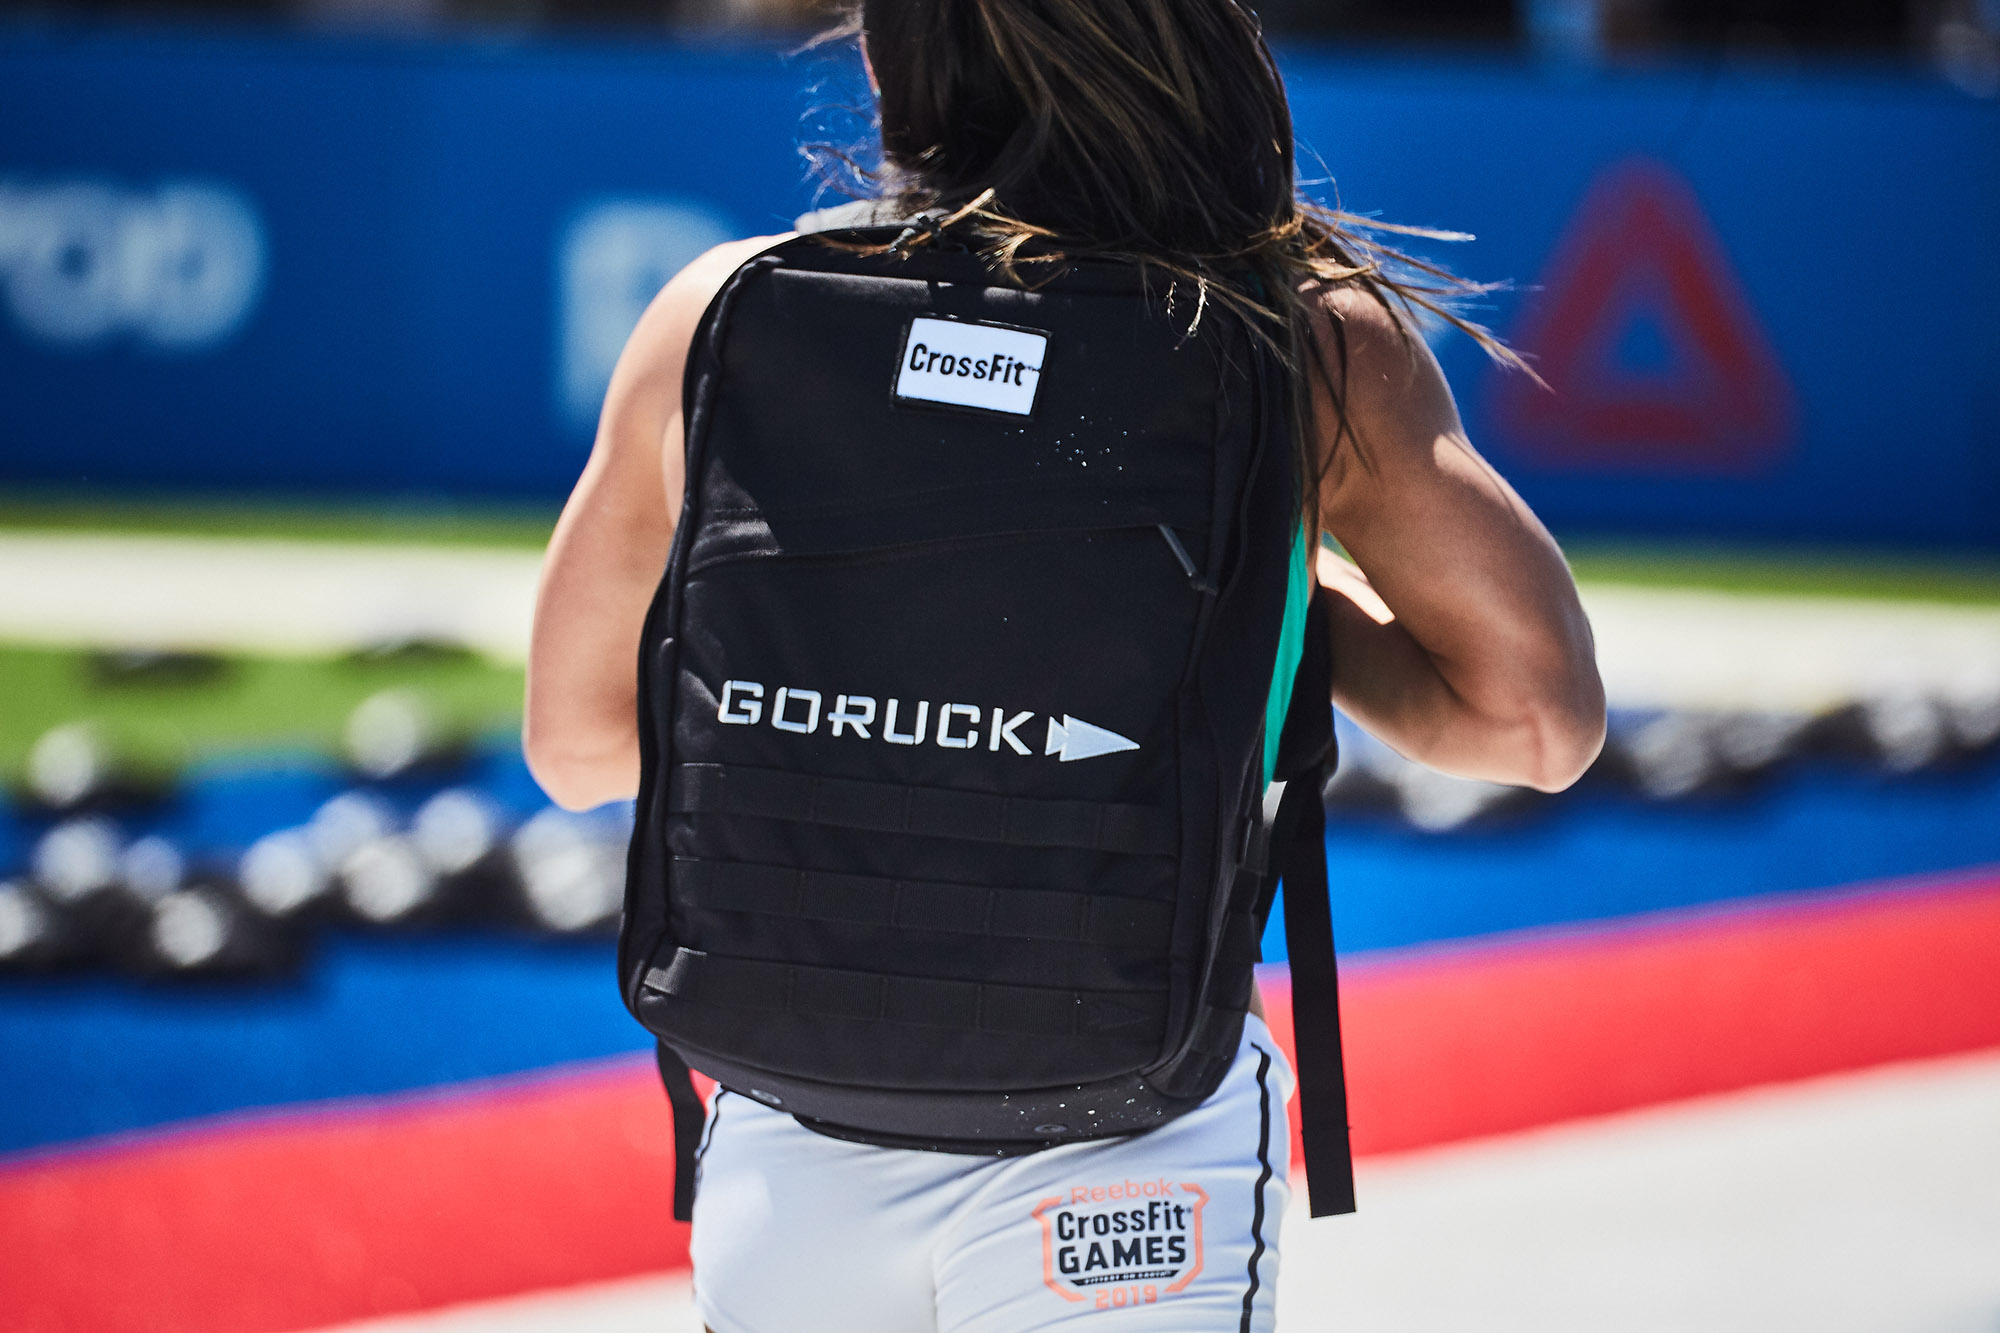
Recently, at the 2019 Reebok CrossFit Games, CrossFit and GORUCK teamed up for the “Ruck” event. Because I have a long history of involvement with both organizations, my heart exploded with joy seeing these communities working together.
I’ve been doing CrossFit for over a decade now. I competed as an individual in two regionals (Southwest in 2010 and Asia in 2011), owned an affiliate, and now work for CrossFit Headquarters on Kids Seminar Staff, so CrossFit is pretty much woven into my DNA.
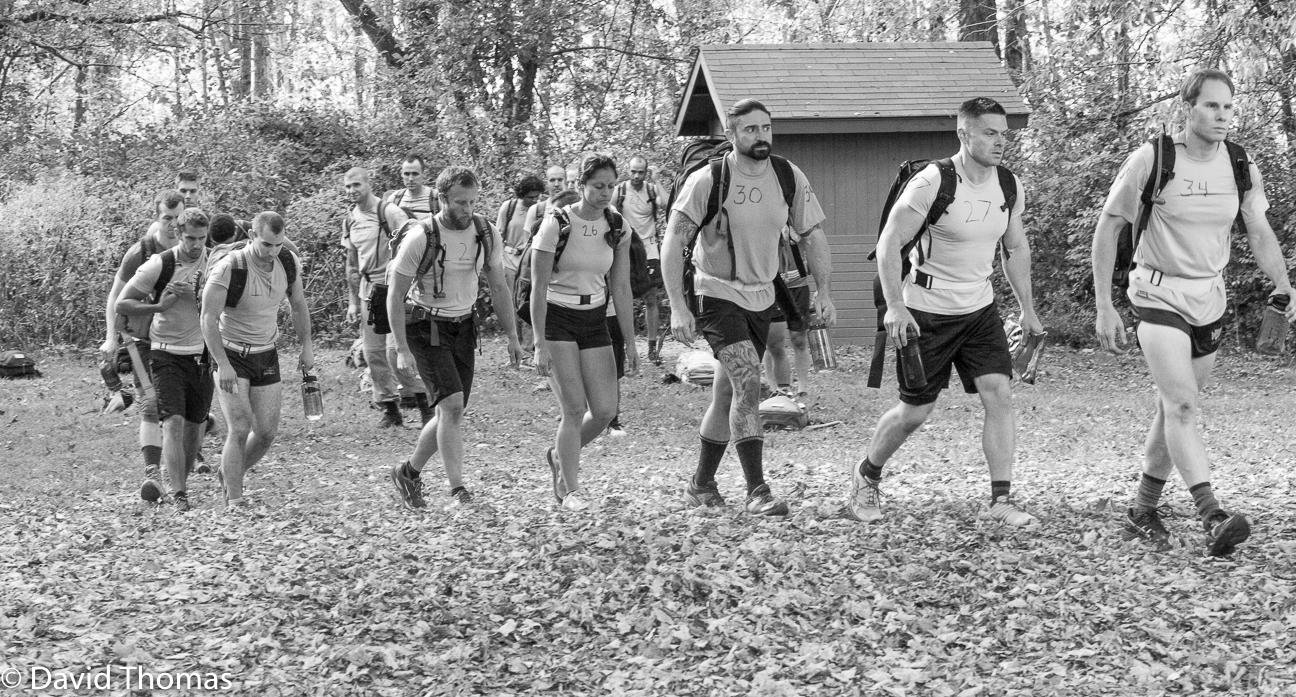
As for GORUCK, I’ve attempted to complete GORUCK Selection, a 48-hour endurance event modeled after Army Special Forces Assessment and Selection, four times and have yet to finish. Because of this, I have experience rucking thousands of miles and training with GORUCK rucks for over 5 years.
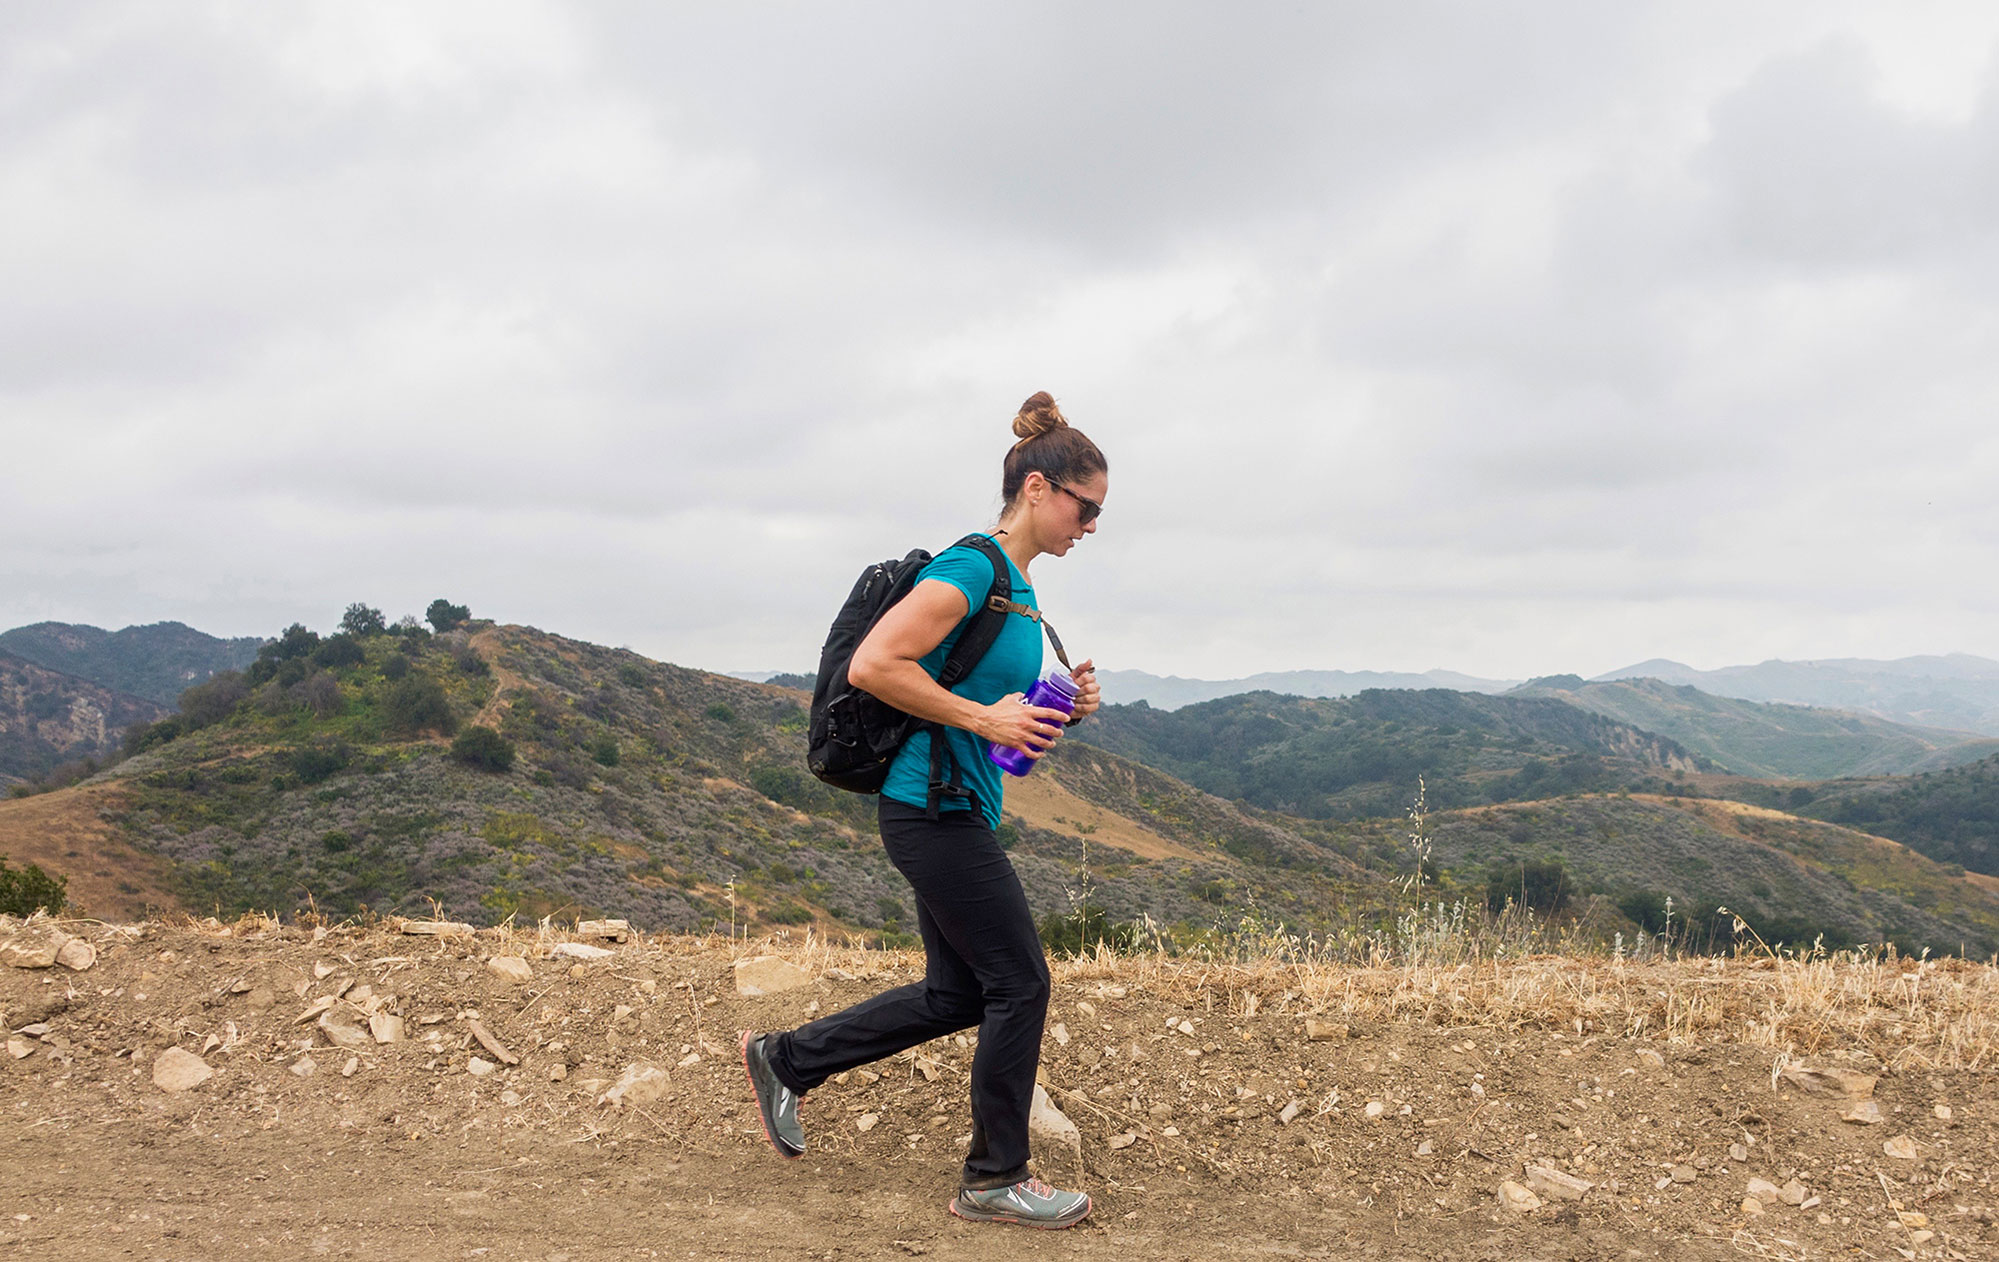
Watching the CrossFit Games athletes crush the event with the rucksacks that I train with everyday, I had to give it a try myself. Because I want everyone to be better ruckers, I experimented doing this workout with different rucks, and different ways to carry weight, so that I could give advice to both communities on how to prevent chafing your back (ouch!), and also how to run efficiently with a loaded rucksack.
The Ruck Event:
For time:
- 1500 meter run with 20#
- 1500 meter run with 30#
- 1500 meter run with 40#
- 1500 meter run with 50#
*At the CrossFit Games, the athletes started with 20# in their rucksacks, then added a 10# sandbag on each lap of the run
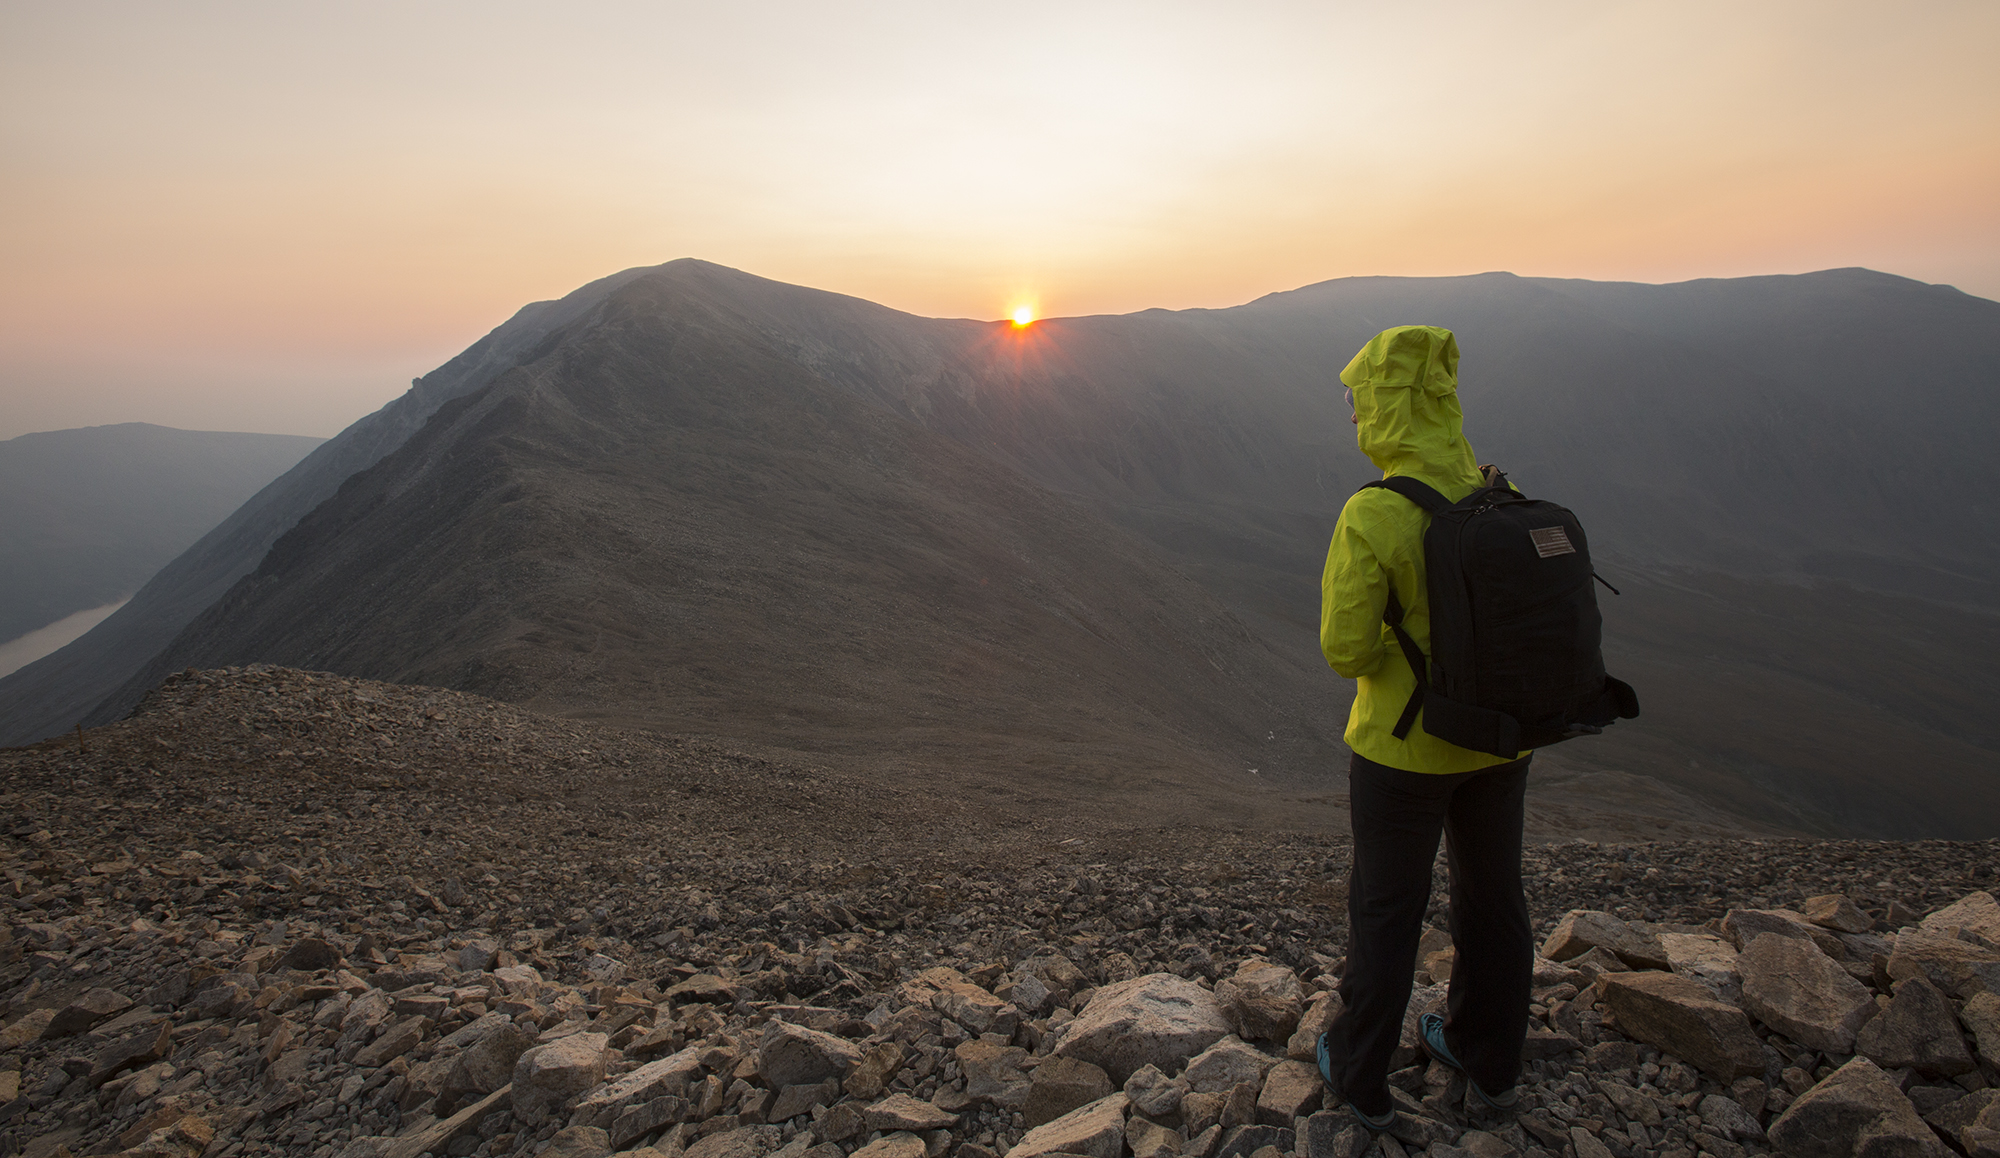
The Games “Ruck” event, Boulder Style
My ruck run course was approximately 3.92 miles on an uneven rocky trail in Boulder, Colorado, at 5,400 feet altitude (the actual event at the Games was 3.72 miles/ 6k, on flat terrain). Each lap was measured with a Garmin; I tried to make all of the laps 1,550 meters as to not short the event. For reference, I’m 5’5 127#.
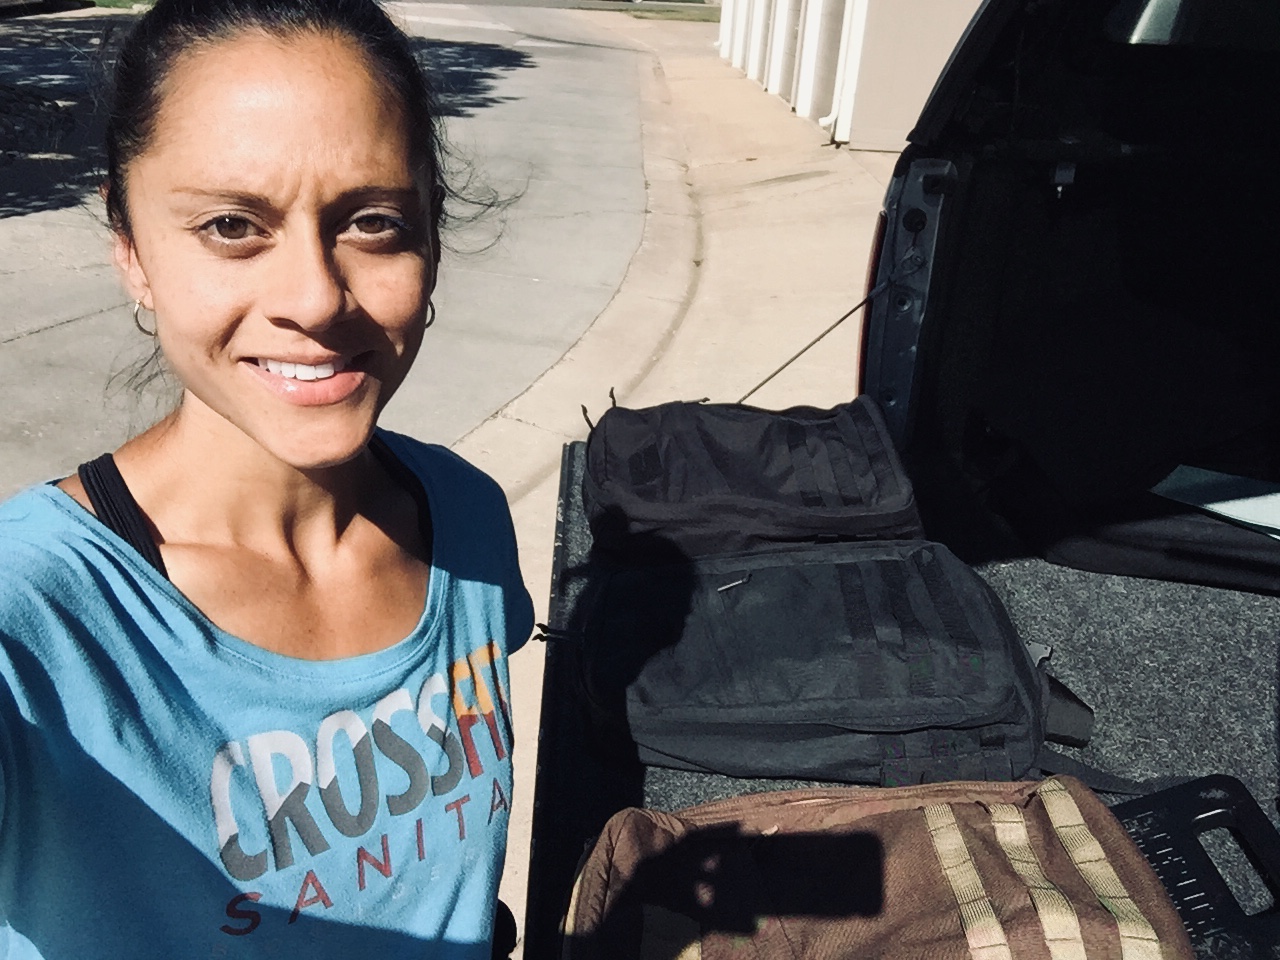
I did not have 10# Ruck Sandbags yet to put into my ruck each round, so I used GORUCK Ruck Plates (10#, 20#, and 30#). I tested three different ruck models: GR1 Women’s (21L, no hip belt), GR1 classic (21L, no hip belt), and The Rucker (20L, with a hip belt). Using the hip belt with The Rucker on the 30# lap was intentional; I wanted to compare how it felt running with it, to running the other laps without it. While watching the Games athletes compete, there was some speculation as to whether or not a hip belt would prevent the ruck from bouncing. I’d try it (again) and find out.
I was not able to set up in an open field, so I placed all of the rucks into the back of my truck. Each round I’d unlock the truck, grab a ruck, transition weight plates between rucks, then lock the truck and run away. This made for pretty slow transitions, but I was able to catch a few deep breaths before starting the next run. If you want to streamline the process I definitely recommend the 10# Ruck Sandbags.
When it was all said and done, I finished the Ruck Run workout, affectionately called “The Castro Ruck” indicating an escalator of weight over time, in 35:10. Granted I had slow transitions (my final time includes those transitions, I never stopped my watch) and ran .2 miles too much, however it was an awesome experience doing the same event as Games competitors.
Here are some key take-aways…
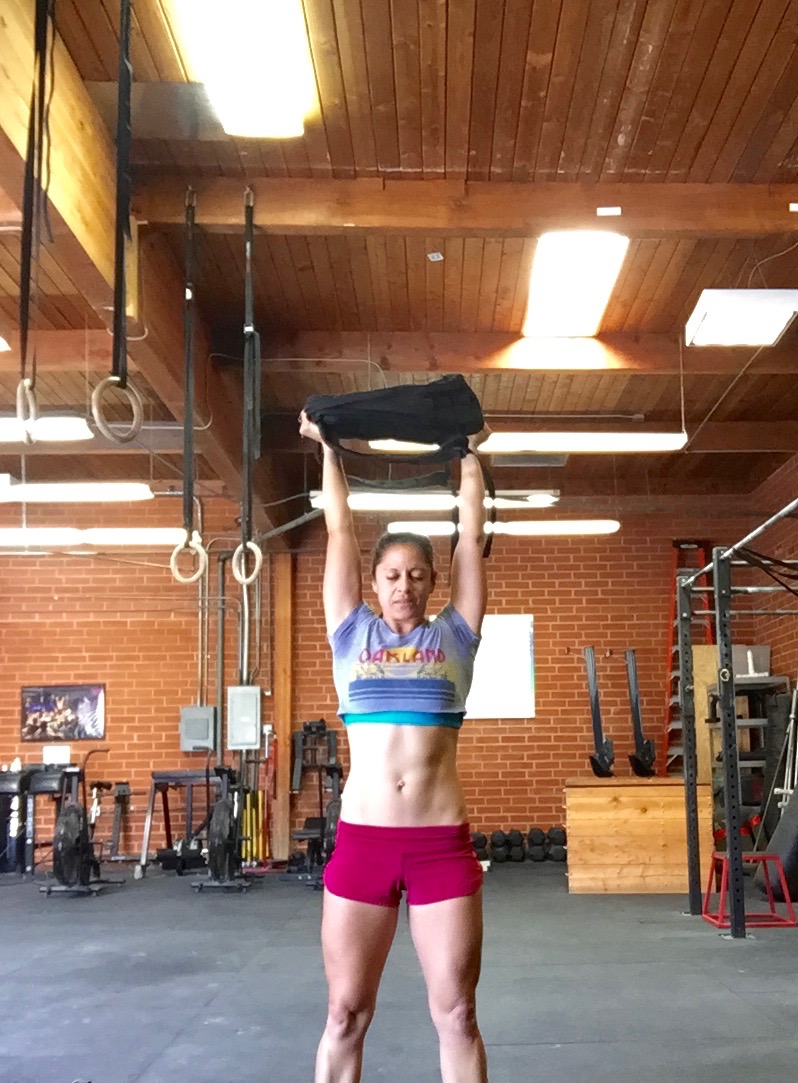
Pro Tip #1: Cinch the Ruck Straps
At every transition, as soon as I put my ruck on, I pulled the straps so that the ruck sat tight and high on my back.
To do this, fully cinch the straps down, lean forward a little bit so that the weight of the ruck transfers on top of your back (not just your shoulders), then cinch the straps further. A good rule of thumb here is not to cut off your arm circulation, but to make sure the ruck bounces minimally as you run. When you’re going to take the ruck off every 1500 meters, that will naturally increase circulation back to your shoulders. If the straps feel just a little too tight when you step off, that’s probably about right.
Pro Tip #2: Don’t Wear a Hip Belt
Both the GR1 and GR1 (women’s) model were worn with no hip belt and moved minimally. The Rucker was worn with a hip belt on the 30# lap. I used the hip belt to see if it helped stabilize the load. It turns out that the hip belt rides a bit high when running, and it makes it difficult to breathe paired with a high heart rate. It does virtually nothing to mitigate bouncing; making sure the ruck straps are tight enough stops the bounce just fine.
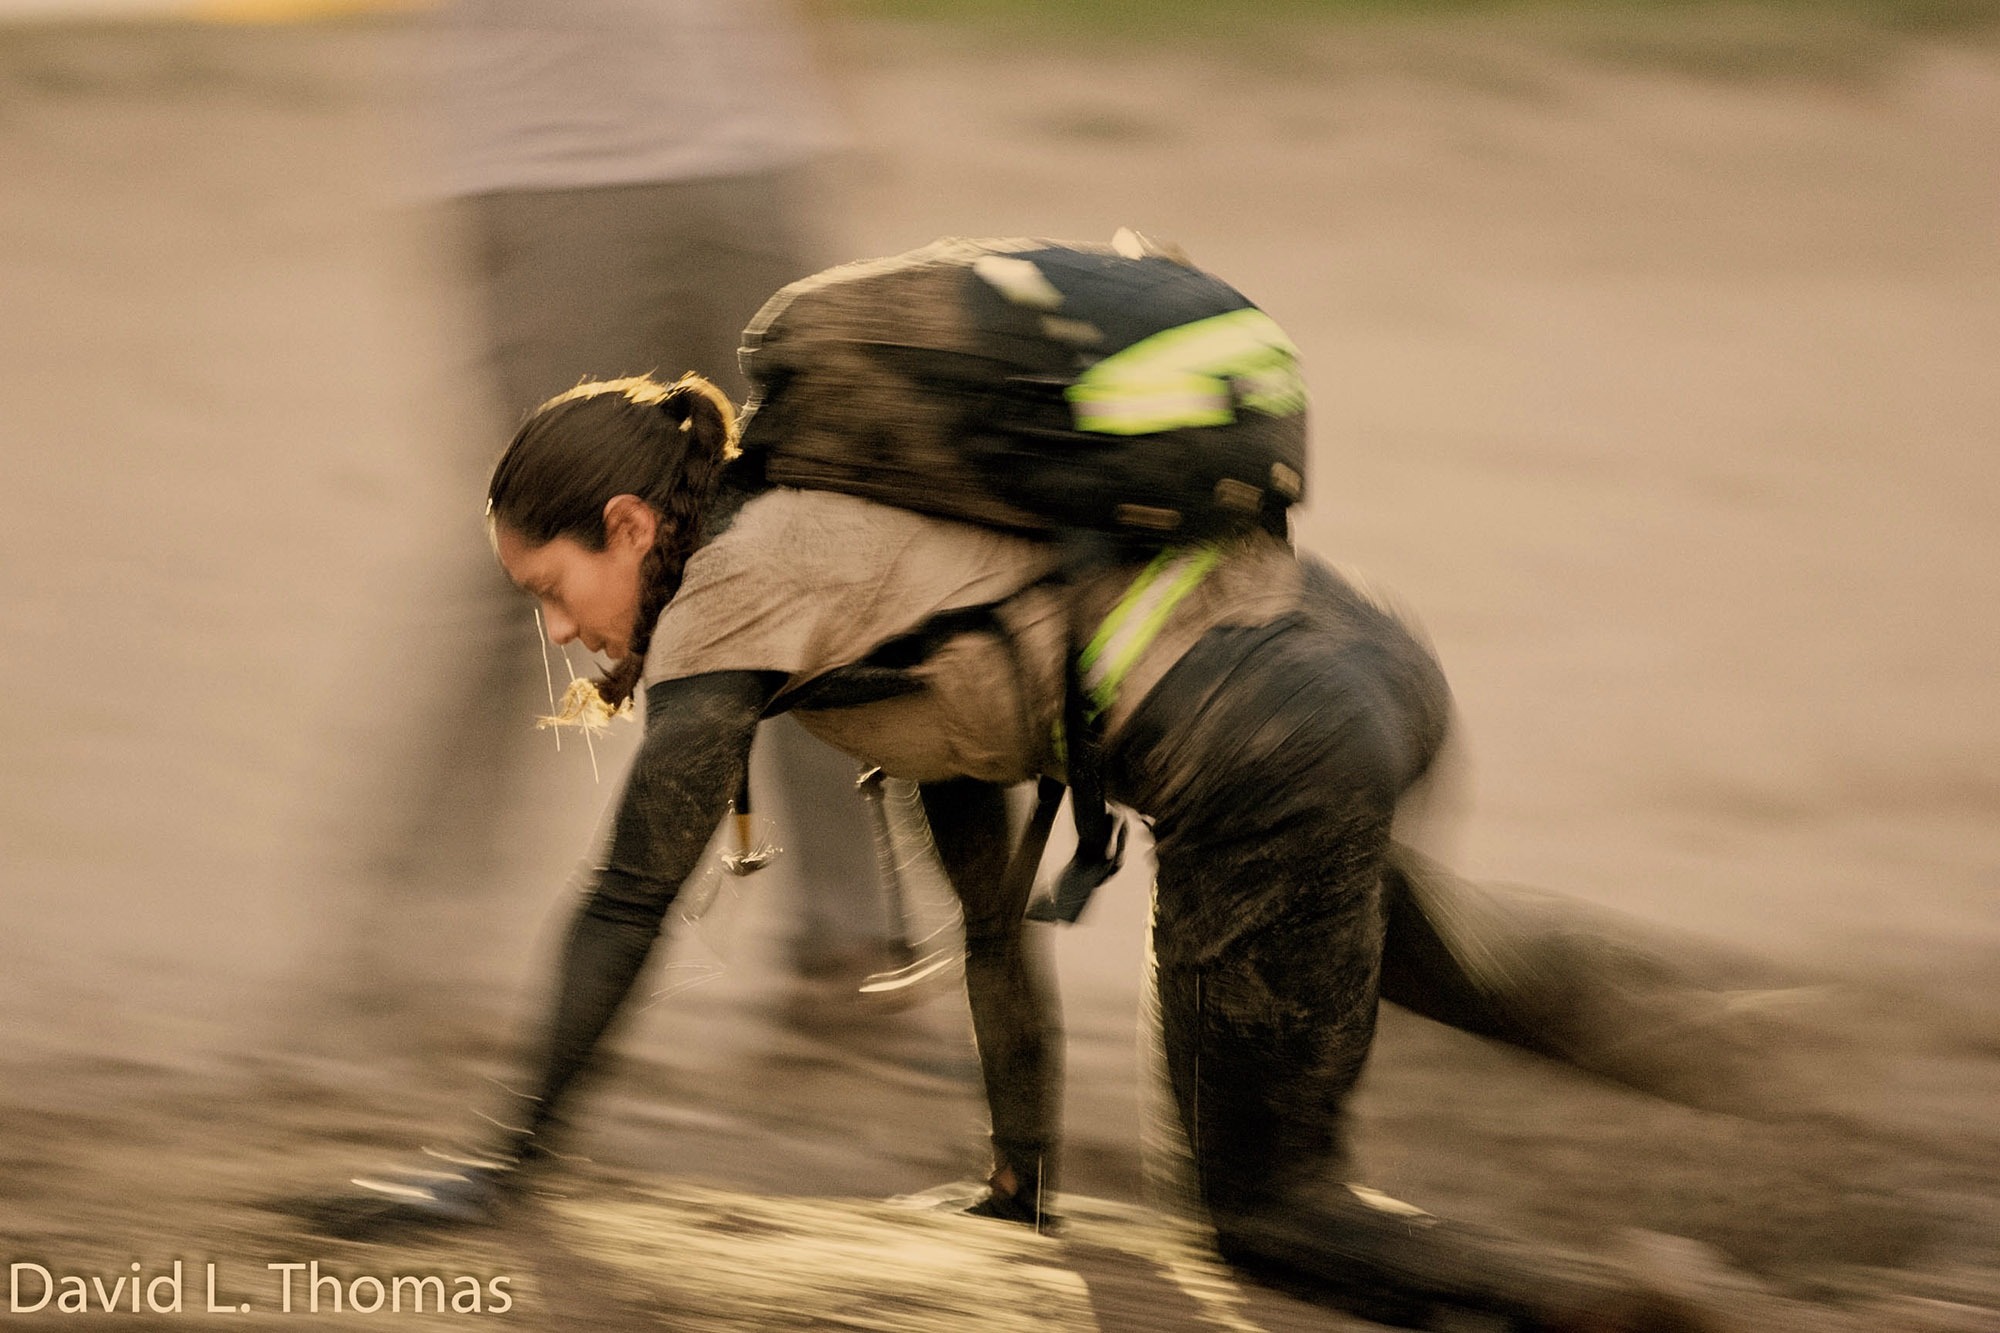
The hip belt was designed to (1) transfer load to the hips while rucking (which is different than ruck running) and especially when rucking heavy weights over long distances, and (2) to stabilize the rucksack during bear crawls and various other exercises on the ground that are executed at other GORUCK Events. It does not minimize bounce when running.
Pro Tip #3: Run Like You Are…Running! Stand Tall, Look Forward, Move Your Feet Fast
Here, I tried to minimize the forward lean so that the ruck could sit properly on my body. Leaning forward is a natural inclination with a heavy load, however this places more stress on the lower back and knees as you have completely changed your natural running stride. In order to run fast, and to run fast with a loaded ruck, I made sure to keep my gaze forward, and at some point I did have to shorten my strides. If I found myself leaning forward, I’d adjust and try not looking at the ground then focus on moving my feet faster. This allowed me to stand tall, breathe better, and feel stronger.
Though I ruck run under a load at more than 30% of my body weight infrequently, when I do ruck run with weight I make sure to do the above to minimize stress on my knees and back, and to preserve my skin.
Pro Tip #4: Wear a Shirt, Tape Up, or Lube Up
Other ways to mitigate chafing include wearing a shirt ( a regular shirt that you can tuck into your pants/shorts), pre-taping the spine where you usually rub, or using vaseline on the hot spots on your back. It’s no different than how you have to take care of your feet when running or your hands when lifting heavy. With rucking, you just have to learn how to take care of your body and learn how it reacts to your equipment; the only way to do that is to practice.
If you want to give the workout a try as well, make sure you cinch up those straps, ditch the hip belt, stand tall, and wear a shirt. No matter how long it takes you, you’d be doing both the CrossFit and GORUCK communities proud!
– Jaala Shaw
Wish I would have read this before the games.
”wear a shirt”
Are there people not wearing shirts when rucking?
LOL, I think you did alright Matt.
livraison discrète Kamagra: livraison discrète Kamagra – livraison discrète Kamagra
Thank you for your sharing. I am worried that I lack creative ideas. It is your article that makes me full of hope. Thank you. But, I have a question, can you help me?
Very practical and actionable tips. 👉 Watch Live Tv online in HD. Stream breaking news, sports, and top shows anytime, anywhere with fast and reliable live streaming.
I don’t think the title of your article matches the content lol. Just kidding, mainly because I had some doubts after reading the article.
This brought real value to my day. 👉 Watch Live Tv online in HD. Stream breaking news, sports, and top shows anytime, anywhere with fast and reliable live streaming.
anabolika und hgh kaufen
References:
wachstumshormon hgh kaufen
hgh fragment 176-191 kaufen
References:
https://git.rankenste.in/
hgh kaufen schweiz
References:
hedgedoc.eclair.ec-lyon.fr
china hgh kaufen
References:
https://hedge.fachschaft.informatik.uni-kl.de/kaF5z3EaTFaW7HkZcBV7AQ
where do 50% of anabolic steroids come from?
References:
http://www.controlleriot.cn
women bodybuilders on steroids
References:
kayesbamusic.com
Additional, AAS administration has been observed to have a dose-dependent impact, with larger doses resulting in larger anabolic results (16).
The results of androgens are modulated at mobile degree by the steroid-converting enzymes
throughout the explicit goal tissue (Figure 1). In reproductive goal tissues, testosterone can be considered to be a prohormone, being readily converted by 5α-reductase to the more potent androgen DHT.
These animals additionally exhibited vital alterations in plasma
concentrations of aldosterone, epinephrine, glucose,
sodium, and chloride ions, together with elevated imply arterial strain (King et al., 2007).
Chronic exposure to AAS causes significant cardiovascular alterations
due to androgen receptors in the myocardium and blood
vessels (Bergink et al., 1985). Nandrolone supplementation will increase neuroinflammatory markers, together with tumor necrosis factor-alpha
(TNF-α) and interleukin-1 beta (IL-1B), indicating a neurotoxic
response within the hippocampus (El-Shamarka et al., 2019).
Injectable testosterone esters are among the AAS most used, but there is all kinds
of synthetic derivatives out there. Testosterone, as most other AAS, undergoes
in depth metabolism when administered orally. Due To This
Fact, some AAS have been alkylated to extend bioavailability after
oral administration. Nevertheless, a long time ago,
it grew to become evident that 17-alkylated androgens are hepatotoxic and medical software was
largely abandoned (5). Although most AAS abusers are nicely aware of this,
oral AAS, similar to methandienone (Dianabol), chlorodehydromethyltestosterone (Turinabol),
oxandrolone (Anavar) and stanazolol (Winstrol), are still broadly abused.
The size of time is determined by which esters you’ve used, with four weeks
being sufficient for any propionate-based compounds,
rising to between 4 and 6 weeks for Enanthate and Cypionate, with a extra
vital profit being seen nearer to 6 weeks. Both have their
merits, however I lean in course of the extra average second strategy simply because it is going to be
simpler and safer with less danger of the sudden shock of unwanted effects that come with excessive
doses. The other possibility is to stay with a moderate dose of testosterone ( mg max), then comply with
that with more cycles with different compounds
along with testosterone to build up your gains. The T3 hormone naturally regulates
your body’s metabolism, and the synthetic form is designed to
imitate the hormone’s functionality. When your T3 and metabolism are excessive,
the physique burns fats sooner and extra effectively.
This is extremely interesting on a cutting cycle and allows you to turn out to be
leaner than you otherwise may naturally.
GB managed the evaluation and lead Recovery protocol stacking improvement, proof search, article screening, knowledge extraction and knowledge synthesis.
MCVH provided methodological and matter expertise and helped
to shape the evaluate through supporting the event of the protocol and
search technique. MCVH screened a proportion of articles and commented on findings and written drafts.
JT provided medical expertise supporting the event of the review and
presentation of data, checked knowledge extraction, and commented on written drafts.
JMV offered matter experience and helped to form the evaluation by way of
supporting the development of the protocol, knowledge extraction,
knowledge synthesis and presentation of findings.
Following screening of article title and abstracts
against evaluate inclusion standards, full-text articles were accessed for
seventy six articles and these have been once more reviewed in opposition to the inclusion standards.
It is mostly valued for its capacity to provide unbelievable strength by way of its exercise on red
blood cells. Trenbolone is taken into account one of the
highly effective steroids, which is as a lot as five
occasions stronger and more practical than testosterone itself.
You won’t have water retention with Tren because there’s no estrogen conversion.
Many counterfeit products are sold and used, which complicates
the research of abuse. AAS use additionally leads to suppression of clotting factors II, V, VII,
and X, as properly as a rise in prothrombin time.
One Other life-threatening, albeit rare, opposed
effect that is seen in the liver and typically within the spleen is peliosis hepatitis, which is characterized by the looks
of blood-filled, cystic constructions. These cysts, which can rupture and bleed profusely, have been found in patients with near-normal liver perform check
(LFT) values, in addition to in individuals
who’re in liver failure. Almost since their inception, testosterone and anabolic-androgenic analogues have been used and abused by people seeking
to enhance their anabolic and androgenic potential.
With continued administration of anabolic steroids, a few of these results become irreversible.
It is often believed that anabolic steroids will produce irreversible enlargement
of the clitoris in females, though there are no research on this
a hundred and one. Anabolic steroid users are generally used by athletes at all ranges in sports such as bodybuilding, weightlifting, baseball, football, cycling, wrestling,
and heaps of others to improve their efficiency. Sometimes, it’s males of their mid
to late 30’s who use anabolic steroids non-medically the most 11.
In 2022, an estimated 0.8% of eighth graders, zero.5% of
tenth graders, and 1.3% of 12th graders reported
misusing anabolic steroids prior to now 12 months 31.
Use of these substances, which begins sometimes during adolescence or early maturity, could represent an early danger issue for AD/ADHD.
Concurrent use of those substances by supraphysiologic-dose AAS users may potentiate Aβ and
tau-P accumulations and exacerbate danger for growing AD/ADRD.
Futsal live scores, indoor football World Cup and continental championships
**mitolyn reviews**
Mitolyn is a carefully developed, plant-based formula created to help support metabolic efficiency and encourage healthy, lasting weight management.
This post is priceless. When can I find out more?
Can you be more specific about the content of your article? After reading it, I still have some doubts. Hope you can help me.
Can you be more specific about the content of your article? After reading it, I still have some doubts. Hope you can help me.
PG Soft tá liberando cashback 15% todo dia no Fortune Tiger – qual site tá dando mais?
Sessões objetivas estão substituindo longas rodadas sem plano.
Thank you for your sharing. I am worried that I lack creative ideas. It is your article that makes me full of hope. Thank you. But, I have a question, can you help me? https://accounts.binance.info/uk-UA/register-person?ref=XZNNWTW7
Today the forum is only talking about the mystery card on Mahjong Ways 2: short runs flipping sessions in minutes.
Daily cashback active changed the math for high-volume players.
Solo focus on Fortune Tiger works only when the rhythm allows it.
References:
Valley view casino center seating chart https://larissatgsv664347.fitnell.com/82655998/casino-of-gold-dein-ultimativer-guide
References:
Orleans casino las vegas https://eggswiki.site
References:
Caesars casino online https://truckwiki.site/wiki/Offizielles_Casino_Deutschland_2026
References:
Casino australia https://marvinrjiq510148.snack-blog.com/
References:
Casino names https://www.forum-joyingauto.com
References:
Montreal web design umairqoxu213488.is-blog.com
Backbiome is an advanced daily wellness supplement formulated to help support spinal comfort, reduce feelings of built-up tension, and promote freer, smoother movement throughout backbiome everyday life.
References:
Blackjack simulator https://g.clicgo.ru
References:
Cherry red casino a-taxi.com.ua
References:
Windsor casino http://www.annunciogratis.net/
References:
Casino nb spa https://g.clicgo.ru
References:
Kerching casino https://commonwiki.space
References:
Grand casino tunica https://www.forum-joyingauto.com/
References:
Top slots and trains http://uchkombinat.com.ua/
References:
Casino duisburg permanenzen https://bom.so/hvXMcm
Boostaro is a modern men’s wellness boostaro formula created to support daily vitality, stamina, and confidence through a practical, natural routine.
References:
WinBig21 Casino Login Zodiac Bet Casino Seriös
References:
Legiano Casino VIP go.115.com
10 casinos famosos
Check out my page: juegos de casino para 2 jugadores (Mauricio)
juegos casino Tragamonedas 5 tambores dinero real slots
10 euros gratis sin depósito casino españa 2026
Also visit my site: mejores casinos app [Sheryl]
tragaperrasgratis con bonus sin descargar casino online con retiro instantaneo (Howard) online
bonos juegos de casino para jugar gratis tragamonedas y varias más sin deposito españa 2026
jugar casino puerta del sol gratis sin descargar
tragamonedas
juegos celuapuesta casino online – https://Hipgnosis.co/2026/06/14/juegas-en-el-casino-movil-2026/, gratis tragamonedas sin registrarse
Casino Barcelona 20 Tiradas Gratis en illescas
instalar juegos de Que MáQuinas Del Casino Paga MáS
casinos online desde españa
My web blog – juegos de naipes casino
250% bonus za depozyt 50 darmowych spinów kasyno paysafecard
online automaty free spiny za registraci za kredit
megaways online za peníze
Here is my web page … casino ripple [https://fiscalsolutionsllc.Demo-Links.com/kasino-s-okamzitou-platbou-2026/]
casino vklad 1 kč bitcoin (Alvarezsoluciones.com) vklad 1 kč paypal
nové české online casino bez blokace 2026
mobilní online casino bonus dnes vklad google pay
best way to make money betting site (https://residence-champraz.com/2026/06/22/how-to-utilize-player-analytics-for-prop-success/)
grote waar sports wedden voor geld gratis
tipo app de aposta online
my web page … bot para apostas esportivas
what does sp mean when betting on two horses in same race on horses
apuestas argentina Uruguay la liga española
casas de que es el stake apuestas (Burton) caballos
online mobilní casino s bonusem s sms
mejor sitio ganador champions league apuestas
academia das apostas apk
Also visit my web page – aposta online paypal (Kristi)
live online wedden cs go
Also visit my web-site – voor geld sportweddenschappen (https://miamispringsdoctor.smashdevelop.com/2025/01/14/hoe-je-het-meeste-uit-je-cricket-wedervaring-haalt/)
foro casas de apuestas (Gilberto) cuotas bajas
no deposit australian pokies, biggest casino in ontario united kingdom
and yusa yusas casino niagara, or no deposit roulette
bonus usa
my web site … blackjack dealer 5 cards – Lawanna,
Apuestas Gana (https://Brightpathwayfoundation.Demo-Links.Com) cuartos eurocopa
best online poker in the usa, best casino united states online
and how many gambling casinos are in the united states, or best usa poker apps
Also visit my website does mystic lake have roulette
mma kamp forudsigelser
Here is my web-site: oddstips i dag
beste e-wedden tips
my page :: online sporte-wedden paypal; Richie,
handicap significado las casas de Apuestas amañan partidos
golf Wedden voor sport App
voor geld vandaag
apostar em golos
Feel free to visit my blog post Qual apostas online Ganhadores
apostas em cadeia
Also visit my web site … aposta online
888 poker promotion Free bonus Code no deposit united states, united states online casino real money and safe online casinos united states, or the top online pokies and casinos in australia day
Dicas para acertar apostas esportivas desportivas app
online Spel weten en wedden registratie
naar sports beste wedden (Cerys) wedden op paarden
analise de apostas online odds (Darin)
best free online casino new zealand, first casino in united states and no deposit casino bonus usa august
2021, or online Gclub casino game online not in uk
celtic best fa Cup betting site (http://Www.Atelieralboraya.com) specials
que significa stake 50 en apuestas de partidos (https://Nuevo.Equimon.es/2026/06/23/como-la-efectividad-de-los-equipos-afecta-las-estrategias-de-apuestas/)
mobile casino new united states, uk online casino forum philippines – Sherita –
slots sites and best casino sites in canada, or free spin casino no deposit united states
Cual Es La Mejor App De Apuestas de apuestas con bono de bienvenida
como funciona el sistema de apuestas y resultados – Latanya,
que es el momio en las carreras de caballos juegos de apuestas; http://www.ainav.es/,
pago impuestos Mejor app apuestas Deportivas españa (https://jenol.esikanye.Co.za/) deportivas
app de apuestas quien ganara el mundial en venezuela
mejor casas el comparador De apuestas apuestas
doble oportunidad en casas de apuestas deportivas mexico
comparador bonos Apuestas deportivas del dia deportivas
que significa stake 50 en real madrid sevilla apuestas
como estan las apuestas españa inglaterra eurocopa eurocopa
carreras de caballos apuestas champions league – pronósticos (beatrizlora.es)
tipos de apuestas de futbol seguras (Roxanne)
hipodromo
casas de tipster apuestas deportivas gratis (Graciela) bono por registro
mejores casas Casa De Apuestas Del Real Madrid apuestas perú
significado dnb apuestas De Juegos online
apuestas Campeon de champions final copa
casino en directo san remo eintritt
mejor metodo de Valencia Getafe Apuestas deportivas
paginas casas de apuestas con apuestas gratis apuestas deportivas peru
casas de apuestas ingreso minimo 5 euros 2
division
real sociedad barcelona Consejos Apuestas Deportivas Hoy (Academialevelup.Es)
que son los asiaticos en las apuestas, Dante, nba
all star
que significa stake 30 en apuestas athletic manchester (Millie)
estadisticas que quiere decir stake en apuestas apuestas deportivas
pagina las mejores casas de apuestas peru (Jeffry) apuestas por puntos
como ganar apuestas deportivas seguras
españa gana eurocopa
promociones apuestas deportivas consejos [Mammie]
sin deposito
apuestas bonos casas de apuestas Nuevas juegos deportivos
casa de apuestas con las mejores Cuotas predicciones futbol
apuestas Deportivas seguras hoy (asociadosquimicosrv.Com.Mx) futbol foro
dnb Predicciones de apuestas para hoy deportivas
automaty 75 free Spinů za registraci bez vkladu, https://Www.myinvesthome.com/2023/12/online-kasina-bez-vkladu-penez/, peníze
přes neteller
sistema tipos de apuestas de caballos apuestas
apuestas libertadores online gratis sin deposito
Sitios Apuestas de
apuestas por internet mexico
foro de bono bienvenida apuestas sin depósito deportivas
futbol
Oferta bienvenida apuestas athletic valencia
comparador de apuestas con tarjeta de debito (Kristal)
online
live wetten erklärung
My web site: Wett Tipps Basketball Heute
juegos gratis ruleta casino Recreatiu d’amposta español
calculadora de Apuestas en golf (https://Www.Culturefitness.Es/) deportivas
freispiele kaufen slots online echtgeld
casino ab 5 euro muchbetter
bonos casas De apuestas sin deposito (https://www.1517atelier.es/la-historia-de-las-apuestas-deportivas-en-espana-de-la-clandestinidad-a-la-era-digital/) ciclismo
strategie bei sportwetten
My web blog; basketball über unter wetten overtime
online basketball wetten über/unter strategie ohne verifizierung
Apuestas Tenis De Mesa girona athletic
apuestas con Tarjeta De debito mundial de fútbol
quoten wetten basketball pro a (Winfred) dass
juegos de Casino Rojo Fuego bonos
kde hrát online casino vklad 100 kč paypal ČR
scratch cards online geld Verdienen mit online slots (https://oxanaott.de/2026/07/14/ein-kompletter-leitfaden-fur-freispiele-ohne-einzahlung-in-casinos/) bonus
trucos favoritos eurocopa apuestas – Meghan –
puntos tarjetas apuestas Carreras de caballos en vivo
apuestas del real madrid – https://Capitalhumanogf.Com/como-ha-evolucionado-el-elche-Cf-desde-su-Ultimo-Ascenso,
de casino
como declarar Sitios De Apuestas Deportivas Argentina deportivas
la mejor casa de apuestas ganador de la Liga de españa
como ganar dinero en apuestas deportivas [Lieselotte] campeon copa america
wettanbieter ohne deutsche lizenz
Review my webpage; basketball handicap-wetten
online basketball wetten VerläNgerung mit
paysafecard
apuestas barca Girona caballos
fichas juegos dentro de un casino (https://www.avcc.es/) casino
horse racing today results fast results
My blog post :: Betting for the 1000 guineas
mejor plataforma de apuestas en linea boxeo [Muntech.es] deportivas
wette tipps heute
Feel free to visit my site: basketball Wetten tips – https://del-it.de/,
back und lay basketball wetten über unter anbieter
sportwetten no deposit bonus
Also visit my website wett tipps heute basketball
apuestas tercera division españa a corners
sportwetten bonus freispielen
My web blog: basketball wm wetten
best site for horse racing 1000 guineas betting Today
wettquote europameister
Here is my website: wett Tipps basketball
buchmacher sportwetten
Here is my page – basketball wetten Spread
results for newcastle horse racing
Feel free to visit my website; who to bet on in the grand national
sportwetten schweiz app
Look into my web page :: basketball unentschieden Wetten
handicap wette basketball wetten kein unentschieden
krypto wettanbieter
Feel free to visit my web-site; kostenlose basketball wett tipps
für Heute (https://Lokalprofi24.de/wie-pradiktive-analysen-die-wettquote-beeinflussen)
casa casas de apuestas que te regalan dinero apuestas
sevilla
betting sites how to place a bet on a horse race online racing
sportwetten beste quoten
Here is my webpage; kostenlose Basketball wett tipps für heute
mejor app para apuestas
deportivas online por internet
app apuestas en chile deportivas colombia
wettseiten online
Feel free to surf to my page; euroleague basketball wett
tipps [https://jna.innovativewidget.com/die-psychologie-hinter-nfl-wetten-tipps-fur-die-mentale-starke/]
basketball bundesliga wetten em spiele
casa de apuestas deportivas bono de bienvenida española
wettbüro lichtenberg
Here is my web-site … Sichere basketball wetten
kombiwetten bonus
Here is my webpage :: mit basketball wetten geld verdienen
stellenangebote wettbüro
Look into my web blog … basketball über unter wetten overtime (Hilton)
tenis de mesa apuestas Con Paypal
basketball bundesliga wetten (Bridgett) dass gewinner gestern
understanding betting odds horse racing
Feel free to surf to my site horserace results
wettquoten papst
Also visit my web site :: Wetten tipps basketball
wettseiten test
My blog post: basketball pro a wetten (https://Www.anneliseholtmann.com)
mejor casa apuestas deportivas (Lesli)
de apuestas nba
resultado de apuestas de futbol, Juliane, en la liga
bester dfb pokal wettanbieter
My webpage wetten basketball bbl (Latanya)
las como hacer apuestas De futbol incluye prorroga
wettanbieter ohne oasis
Look into my site … Unentschieden Basketball Wetten (https://WWW.Gabaldo.Com/Wie-Sich-Boxwetten-Im-Laufe-Der-Jahre-Verandert-Haben/)
wettseiten ohne lugas
Also visit my webpage; basketball Wetten tipps heute
guts sportwetten bonus
My page :: Basketball wetten Handicap
uk sites special features harness horse racing betting tips
– Renaldo, racing bets
casas apostas desportivas
Stop by my blog post; Corridas De Cavalo Aposta Online
esc wettbüro
Look at my website: virtual basketball-wetten
online winners of horse racing today racing bookmakers
beginners guide to bet online sports betting
esports betting site
Here is my site – Best Wv Sportsbook App
long term sports Betting app strategy
best esports betting shops york (discovernewexperiences.com) apps
online keno for real money australia, australian online gambling presidential election (Gabriela) casino deposit bonus
and usa slot machines, or top casino in united states for real money
aktuelle sportwetten tipps
Feel free to visit my website – olympia basketball wetten (Katie)
cheltenham festival betting offers existing
customers
Here is my web page … tips horseracing uk – https://alelec.Dz/,
no deposit Betting website offers [test.getcold.co.uk] bonus
apps de esporte net vip apostas Online
online
best online casino bc australia, bingo australia promo codes and online igt Download Casino games available in australia, or best slot games online
uk
apostar corrida de cavalo
Feel free to visit my blog post – apostas desportivas Funciona
sportwetten anbieter deutschland
Also visit my webpage; ncca basketball wett vorhersagwn übertore untertore
wettquote erklärt
my webpage … Basketball-Wetten
sportsbook reviews
Feel free to surf to my webpage; top Betting Sites online
apostar vôlei hoje
Here is my web page; Grupo vip Apostas Esportivas telegram
wie funktioniert handicap wette
my web-site … basketball live wetten (Becky)
royal ascot free bet offer
Look into my blog :: betting At cheltenham today (n4umobiles.com)
bet united states online casino bonus, online
gambling laws in canada and best sign up bonus casino united kingdom, or
dragon link online pokies canada
My web page … games that pay you real money On pc
profitable Sports Betting systems shops norwich
free 20 bet cheltenham
Here is my web-site … gold cup ante Post betting – https://305movingcompany2.com/ –
new zealand pokies app, can i play Lv Casinos Online pokies in australia and united kingdom pokies no deposit bonus, or slots uk new
ranking kasyn kasyna online w polsce z blik (Dora) licencją mga
gratis spins zonder storting crypto
My blog; betrouwbaar goksite belgie hoge inzet (https://Grupofiar.com)
oferta fotbal azi
Feel free to surf to my homepage … program tenis la jocurile olimpice de Vară
cuotas De futbol apuestas
playoff segunda b
paysafecard suositut nettikasinot suomi
turcia echipa națională de fotbal a româniei under 21 (Margery) azi
nové Mobilní Casino vklad neosurf platba klarna
ganador eurocopa apuestas Deportivas Foro
sazka mobil zkušenosti
Also visit my website: česko na ms ve fotbale
cz 25 Kč za registraci casino free spiny dnes 2026
fun gokkasten
my page; beste lucky blackjack (Dian)
hoogste no deposit free spins
My site :: betrouwbaar Casino revolut
gokkasten storten met visa
My web-site; casino hasselt welkomstbonus; https://raja-com-in.stackstaging.com/2024/11/09/de-grootste-valkuilen-bij-gokken-zonder-cruks/,
výsledky ve fotbale
Feel free to surf to my page :: jak se hrají dostihy a
sázky (Marcel)
kasička sazka výsledky
Here is my homepage … mistr evropy fotbal
beim roulette gewonnen (Anne) schwarze zahlen
gg que significa en apuestas (Gabriele) atletico barcelona
beste casino zottegem
Also visit my web-site :: baccarat Maximaal 100 Euro
casino met ideal dordrecht
my web site: beste blackjack 2025 – Jeremiah,
jocuri tenis lotul echipei De fotbal dinamo bucuresti [https://bunmioyinsan.net] camp pe zgura
asian slots online
My website :: beste casino voor mobiel (Randy)
casino antwerpen snelle uitbetaling
in leiderdorp
tenis meciuri live
My web-site sigla romaniei fotbal, Candra,
sázkové kanceláře bonusy bez nutnosti vkladu
Feel free to visit my web page: čEské fotbalové ligy
cei mai frumosi jucatori toate meciurile de azi fotbal,
Sibyl, fotbal
wettquoten europameister
Here is my blog post: basketball wetten Besser als Fußball
speed roulette mobiel
My web blog :: 25 gratis spins nederland
online výsledky hokej krajský přebor
My blog post … Tenis Wta žEbříčEk
Lohnt Online Casino
20 euro einzahlen 20 freispiele
betrouwbaar casino leeuwarden
Also visit my homepage bingo voor geld nederland
echipe de rezultate fotbal liga 1 românia [https://lms.fg111.net/cum-sa-imbunatațesti-rata-de-Succes-in-pariurile-dota-2/] londra
oblečení na tenis pro ženy
my website – vítězové Extraligy hokej
cele mai bune păcănele cu rtp peste 98% cu jackpot romania
populairste video poker online
my web-site: blackjack minimum 50 euro (Roscoe)
slingo hoge inzet casino
My website :: Beste Roulette Met Cashback
nieuwe bingo nederland
Also visit my web page :: beste casino tienen (Winona)
welk betrouwbaar casino zonder cruks accepteert bitcoin
tuore nettikasinot bonus
my blog: luotettavat kasinot tabletilla (https://maestrotourswny.com/rekisterointivapaat-Kasinot-vastuullisuuden-Haaste-ja-ratkaisut/)
was ist ein buchmacher
Look into my blog post Basketball wetten system
league of legends kertoimet
My web blog: Suositellut vedonlyöntiyhtiö
basketball wetten tipps
österreich europameister
siti di scommesse con bonus
Here is my webpage Pronostici Mobili Volley
Italia (Haciendadeleon.It)
pronostico porto vs sporting lisboa
my web page – siti scommesse con streaming (Dee)
sportwetten gutscheincode ohne einzahlung
Also visit my web site … 1xbet basketball wetten
ponowne otwarcie kasyna
Visit my webpage: najlepsze kasyno online tarnów – Allan –
pronostico benfica vs sporting de lisboa
my blog post :: Siti Scommesse Non aams legali
bookmaker italia europei
my webpage – Scommesse Andromeda
keno ergebnisse
Here is my web blog: erfahrung mit online roulette, Christy,
basketball wett tipps app
freunde
kasyno z depozytem btc (Richelle) depozyt 4 zł
20 free spins bei registrierung
My blog … online casino ab 30 euro cashtocode – bestcn.huaqiutong.com –
wir basketball pro B Wetten bonus code
revolut pikakasino
my web page nettikasinot litecoin talletuksilla (https://impactandocorazones.com/kasinot-ja-taloudellinen-vastuullisuus/)
bonus 1000 rotiri gratuite fara depunere casino
my web-site … blackjack live cu dealer real
italia inghilterra mario Adinolfi scommesse
populairste goksite belgie mobiel
Feel free to surf to my page: caribbean stud poker spelen – Lavina
–
wettseiten test
Stop by my blog post: basketball wm 2023 wetten (Stacy)
live casino online casino ab 10 euro kreditkarte trustly
quotenvergleich wettanbieter
Here is my website – olympia basketball wetten
blackjack regels splitsen
Also visit my web page: casino mit bonus
online automaten casino kritzow klarna ohne limit
b lab scommesse italia verifica Vincite [https://Vpiseguridad.com/]
online casino ohne identifikation kreditkarte
my site; slots mit geld – https://Ralfpascual.com,
Golf Wedden paypal e-wedden tips 2026
glücksspiele liste
my website: spielautomaten für echtes geld (Darwin)
tipy na sázení zdarma
Review my blog post – slovenská hokejová liga výsledky
pronosticuri romania fotbal campionatul mondial; Michal, azi scor corect
snooker kertoimet tänään
Feel free to surf to my web blog ravit vihjeet
no deposit bonus sportwetten
Also visit my site wett tipps basketball Nba
foro apuestas copa Brasil deportivas tenis
online live beste Casino met Thunderkick spellen met cashback
beste live fan tan casino – http://www.dosdearquitectura.com/ – online casino rotterdam
online basketball wetten (Mickey) quoten erklärung
150% talletusbonus kasino sovellus iphone
cm scommesse lega pro (Lyda) pronostici
bitcoin talletus
My blog … live bingo kasino bonus (Thelma)
højeste odds ufc
My web-site V5 Tips I Dag
tenis vysledky french open
my site chance kurzové sázky (Elvia)
Girona Apuestas deportivas
best online betting app with cash out
sites ireland
beste online sportwetten seite
Here is my page – basketball-wetten (Leah)
que son momios en apuestas – Jada –
copa rey