
“Ladies and Gentlemen, START YOUR ENGINES.” Jumping right into a soul crushing training session without a proper warm up can severely limit your training experience. But by adding in a specific warm up procedure, you can reduce your chance of injury, maximize your potential output, and have more fun learning your body and preparing for the journey.
Anti-preppers argue that “you never see a lion stretch before it takes down a gazelle” and they’re right. The King of the Jungle and your lifestyles only vary by a few degrees. You probably have a real job, a daily drive, kids to attend to, mobility issues from years of carrying heavy objects around for too far, preexisting injuries, and maybe a few extra “lbs” you’re still fighting off. Also, unlike the lion that is constantly in search of the next meal, your training needs to enhance your life. We “earn” our food and “finisher beers” by doing hard things. A little prep can make all the difference. We’re going to apply the acronym RAMP to help you easily remember the phases of what we believe will help keep you in the fight, healthier, stronger, and more resilient, for longer.
R – Raise Core Temperature

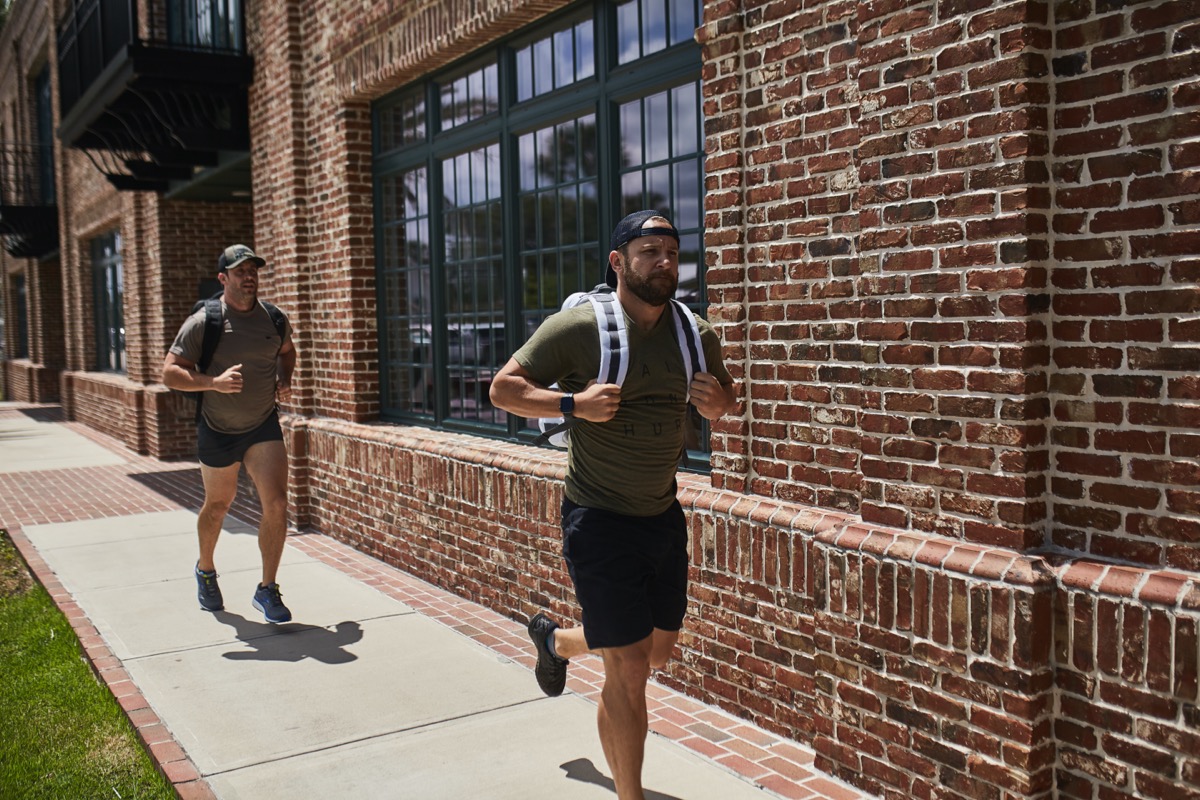
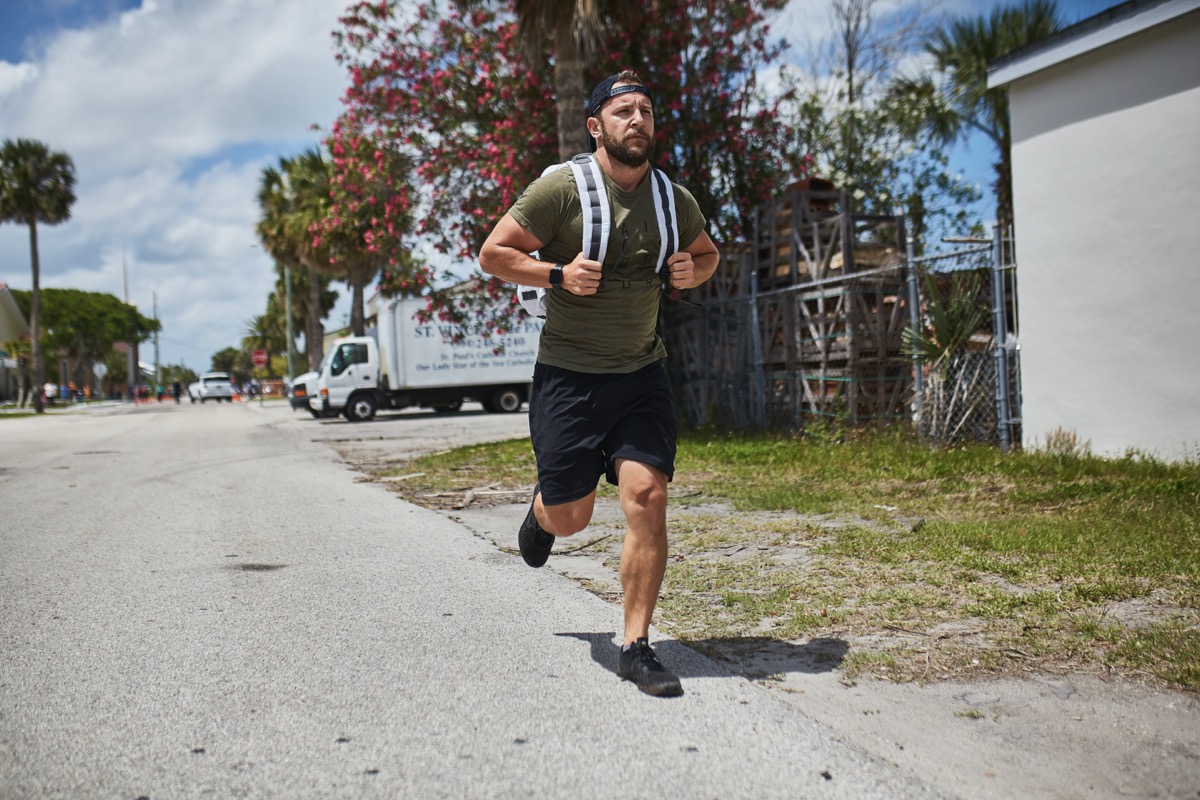
R designates “raise core temperature” or RUCK. Keeping it simple and just moving out for a few minutes at a lower speed and intensity will help grease the groove for whatever tasks lay ahead. These gradual steps help dilate your blood vessels, ensuring that your muscles are fed oxygen while literally heating you up for optimal flexibility, heart efficiency, and body mechanics. The goal is to break a little sweat and start tuning into how your body is feeling. Beyond shaking the cobwebs off, doing some simple joint rotations, breaking out of the “Tin Man” archetype. I can’t think of a better way to break a sweat than to start moving out under a light load. This is an intentionally reduced pace and focusing on the upcoming objectives. Crawl, walk, ruck faster. This is just the beginning. Ease in and find a rythme.
GOAL: Sweat on your forehead and back. If it’s cold outside, the cue is removing a layer of clothing or taking off your hat to help cool down.
A – Activate Key Muscles
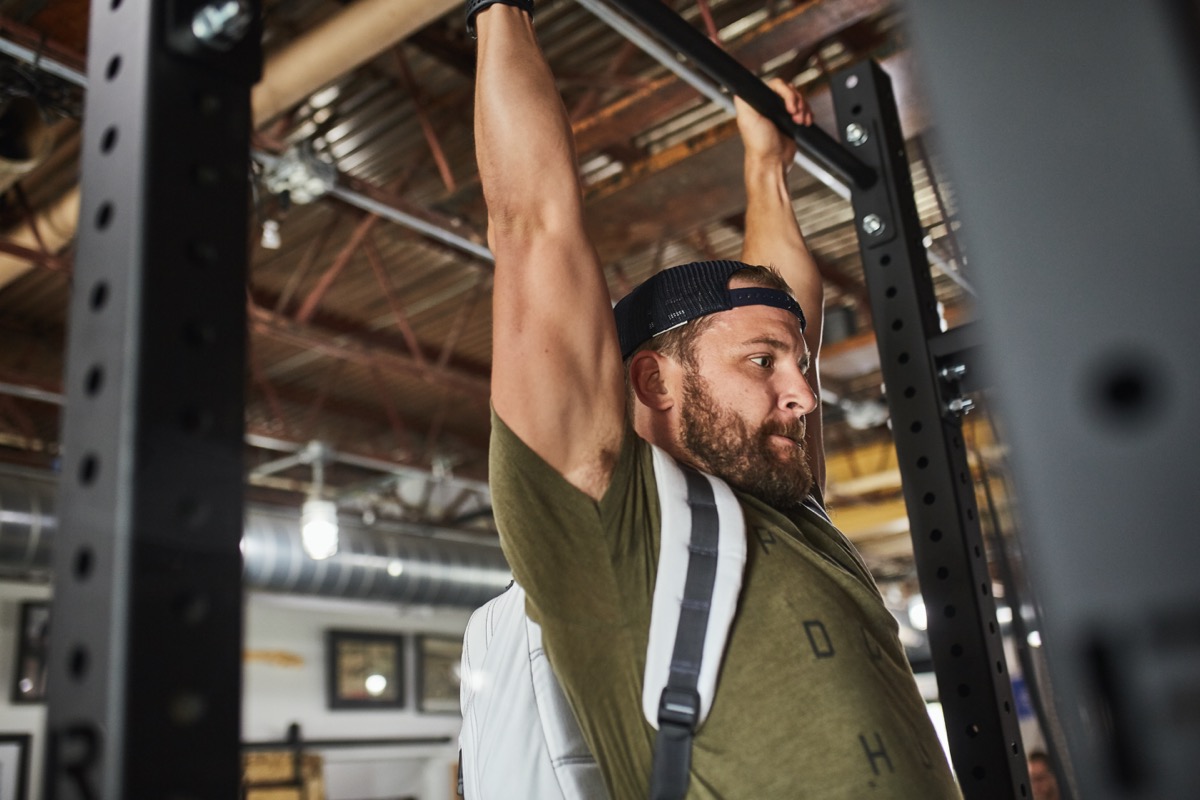

A stands for “Activate key muscles.” I once read an “After Action Report” from a GRT that said he was “surprised at how little rucking they did” at his first event. And the truth is, every “mission” likely calls for different demands. Pulling ammo cans up a ladder, pushing broken down vehicles, assisting teammates over obstacles, moving a telephone pole, this stuff isn’t linear. In training, you’ll likely have little lead time to prepare, so I like to recommend focusing on the stabilizer muscles that you need to help support what will be primarily used.
Examples for upper body are the upper back, rotator cuffs, triceps, bicep tendons, and ensuring your hands are ready for action. A few of my “go to’s” are I’s, Y’s, T’s, banded pull aparts, or primal movements like bear crawls, inch worms, or hanging from a bar.
Lower body is simple because you’re likely already on your feet. But again, I like to recommend slow motion before springing into action. Some smooth high knee steps, tempo controlled air squats, and single leg stability drills get the legs primed for action by forcing you to balance. Moving laterally and in multiple planes can also ensure that your ankles, knees, hips, and trunk are prepared for whatever is about to come your way.
As you work your way through these speeds, levels, and ranges, you’re likely going to identify tightness, soreness, or areas that can be improved which leads us into our next phase.
GOAL: Prioritize stabilization muscles. Focus on the small things and the big things will follow suit.
M – Mobility


M represents for Mobility. I always recommend a practice of mobility “as required” because just being loose and bendy doesn’t equate to being a strong, powerful, and useful member of the team. Being overly flexible can come at a detriment to position, but there is always likely something we can work on. As a rule of thumb, starting from the ground and working your way up can be extremely beneficial. Simply rolling a ball along the arches of your feet can stave off plantar fasciitis. Compression on your ankles and achilles can push swelling out, reduce sticky fascia legions, and set every step up for success. Specific psoas “release” drills can help your breathing, bracing, and movement patterns. The list of problems and corrective techniques goes on and on and the application is dependent on your individual needs. These drills often times don’t tickle. There is a certain level of discomfort associated with making positive mobility changes. Embrace it while having a clear test, retest, and purpose behind this time investment.
We all have different areas that require special attention. It is your job to identify and apply the proper corrective exercises so that you both “maintain your machine” and work to stay as healthy throughout training as possible. If you’re lost here, find a professional to help identify some issues and solutions.
GOAL: Listen to your body and treat it with care. If you need to do any maintenance work, do it BEFORE the action. This is a continuous process and a moving target.
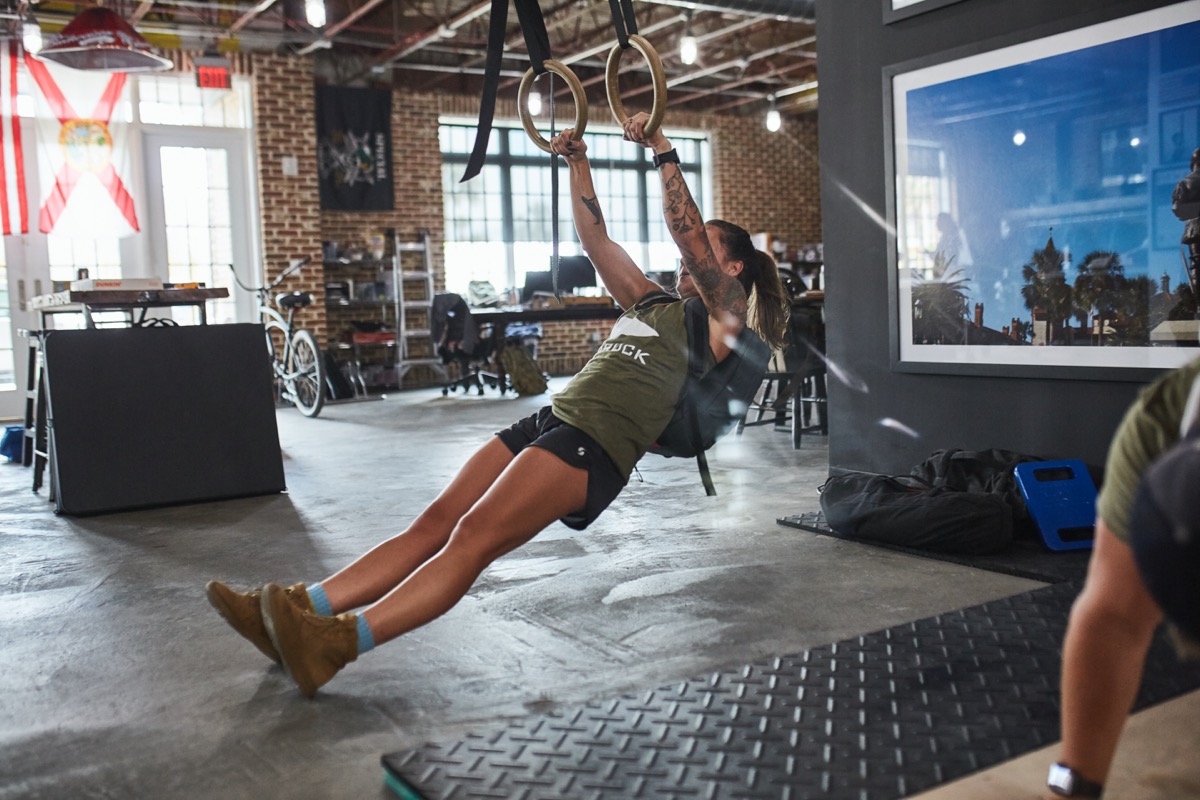
P – Practice, Position and Potential


P is 3 parts. Practice, Position, and Potential. A sandbag clean and press is simple. Pick it up and put it over your head. Without hundreds of practice reps though, there are a lot of little things that can go wrong and positional adjustments that can help set you up for success.
The practice period should be light, smooth, fundamentally sound and experimental. Find the right grip, understand the purpose, grease the groove before you let it rip. Practice a few movements to identify what you need to work on and identify an appropriate weight to use on each training session.
Positioning can mean the difference between a successful day and dropping out of an event. Think about 2 Ruckers, Jill and James. Both on a 10k ruck. Jill stands tall with her ruck, her head is up, shoulders firmly packed and supporting her ruck, midline is braced, and she knows what stride is best for her through lots of practice. James is a hard charger, with his neck sticking out, chest down, running or ruck stumbling any slight gradient down hill, and reaching for every step. We know how this turns out. Depending on speed, there may be a clear “winner” but there may also be extreme fatigue, unnecessary exhaustion, and possible injury. We need to think about our movement patterns carefully and practice all of them. Crawl, Walk, Run, when it comes to load and then speed.
Potential is the final part to the puzzle before we perform. When an observer says “you have potential” that might mean you currently suck. So adding in more practice reps and working on fundamentals and mastery of the basics of movements can absolutely increase your capabilities. This final stage of the warm up focuses on the potentiate that you hold. The goal is to augment the activity synergistically so that you perform at your greatest potential. This can be applied by finally going fast. Jumps, throws, quick sprints and generally moving faster is the final step before it’s time to crush.
GOAL: Practice your movements. Refine your techniques. Identify appropriate loads for your training session.
“If you fail to plan, you plan to fail.”


Finally, visualize your attack. At this point you should be sweating, breathing hard but not exhausted, and feel motivated about getting the work done.
Every day is going to bring new challenges. By testing and practicing the movements before you start, there shouldn’t be any surprises. Finding that pace of consistent and steady movement along with what “red line” feels like is a beautiful thing that can be managed by a systematic approach to preparation. By using the RAMP method to prime your system, you’ll ensure that you’re ready for whatever the day throws your way.
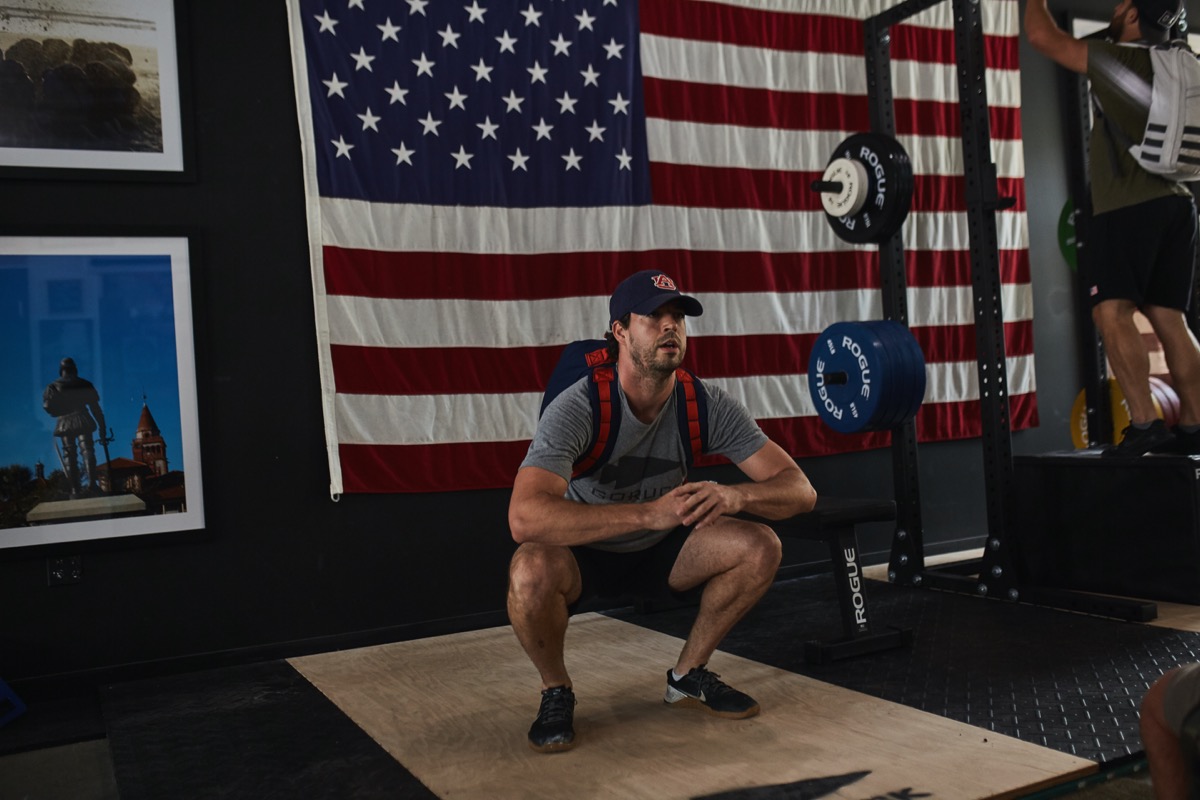
Here is an example of a quick warm up that can prime your body for performance preparing for a workout like 6 rounds of 12 ruck push ups, 12 sandbag cleans, 400m ruck.
Lace up the MAC-V’s:
R- RAISE CORE TEMPERATURE
- Ruck up, casual pace for 3 minutes
A- ACTIVATE KEY MUSCLES
- 5-10 slow unweighted air squats
- 5-10 slow motion unweighted push ups
- 5-10 normal speed squats
- 5-10 normal speed push ups
- 5-10 squat jumps as high as possible
- 5-10 fast push ups
M- MOBILITY
- 10 ankle rotations both feet
- 10 slow high steps
- 10 trunk twists
- 10 arm circles, move your hands in the motion I, Y, T for 10 reps each slowly, 10 neck rotations, shrugs, yes’s, no’s
P- PRACTICE, POSITION AND POTENTIAL
-
- Sandbag Clean practice – start light, work through 5-10 power cleans then gradually reduce the depth of the squat. Focusing on all the points of performance. Build up to your working weight for the day
- Ruck push-up practice: Judge the load and your capabilities, scale if necessary.
- Address other mobility issues – find what you need to work on and invest in your body maintenance.Visualize your fluid movements throughout.
- Grab a sip of water and get to work.
Lastly, a great way to cool down is the same way you warmed up – with a nice and easy ruck around the block, gym or parking lot. Grab a furry friend while you’re at it or just a regular one. You can get in your own headspace
What do I need to get started with rucking or ruck workouts?
I’ve got my gear, how do I know what workouts to do?
- We do the thinking for you with GORUCK Sandbag & Ruck Training aka GORUCK SRT. Get your first 2 weeks FREE! Sign up here.
Featured Apparel:
- Men’s American Training Shorts
- Men’s American Training Shirt
- I/O CrossTrainers
- Women’s American Training Shorts
- Ruck Plate Carrier…back in stock in October!
- Ballistic Trainers…coming in October!
Thank you for your sharing. I am worried that I lack creative ideas. It is your article that makes me full of hope. Thank you. But, I have a question, can you help me?
hgh somatropin kaufen
References:
jokkey.com
hgh kur kaufen
References:
http://woorichat.com/
tren workout
References:
https://git.juici.ly/michelepotting
symptoms of steroid use
References:
4realrecords.com
Most Likely because of the brief half-life and the truth that
it’s easy to hide. Gains are lean as a end result of
their DHT nature, and the worst unwanted effects are going to be hepatotoxicity and cholesterol issues.
Turinabol is another 17-Alpha Alkylated Steroid, thus, it causes hurt to the liver.
Your gains might be a lot drier, and weight
acquire (not muscle gain) will be rather a lot slower.
The downside of this type of protocol is that it might be extremely costly,
and you have a tendency to gain slower compared to the primary group.
Consequently, we see customers hold all of their positive aspects from authorized steroids, as opposed to those who usually lose dimension after taking anabolic steroids (due to the body shifting right into a catabolic state post-cycle).
In modernity, this concept was further developed, by a
scientist named Berthold and his experiments on cockerels accomplished in 1849.
Demand is excessive, but so is the supply and competitors, and
this retains the value down. In truth, you’ll have the ability to simply purchase 1,000 5mg British Dispensary Anabol tablets, one of the
frequent and notable manufacturers on earth for as little as $100.
Other in style brands include Russian Dbol METAHAPOCTEHOROH by Akrikhin (Akpnxnh), Naposim by
Terapia and Anahexia by Jinan Prescribed Drugs.
You may even find quite a few underground labs carry excessive dose Dianabol capsules.
Most Dbol tablets will normally be found in 5mg and
10mg strength, but capsules are widespread in 25-50mg energy.
Unfortunately, while there are some good capsules, lots of them are
rubbish.
FSGS is a histopathological finding marked by glomerular lesions, mediated by various insults directed to, or inherent inside,
the podocytes (172). Herlitz et al. have been the first
to current a case series of nine sufferers who developed FSGS
after prolonged AAS use (169). A tenth affected person described in their publication had no discrete
lesions of segmental sclerosis but did have glomerulomegaly.
Mean body mass index (BMI) was 34.7 kg/m2, with all however
one of the patients having a BMI of ≥30 kg/m2.
Follow-up information have been available for eight of the sufferers, of which one progressed to end-stage renal
illness within 1 month of biopsy. One of the patients resumed AAS use and subsequently developed progressive renal insufficiency and an increase in proteinuria.
Equally, it is one of the most compromising cycles in terms
of unwanted side effects. Hormonally, we find this stack to be very
estrogenic and androgenic. Thus, our sufferers
will often take an AI (aromatase inhibitor) to reduce testosterone’s estrogenic unwanted effects.
A 2024 meta-analysis in Sports Medication confirmed these alternate options provide 60-70% of Dianabol’s advantages without the dangers.
Experience the final word slicing resolution – engineered for
severe bodybuilders. It is essential for readers to understand that stacks will improve
the severity of unwanted aspect effects. Moreover, as a end
result of a scarcity of androgenicity, Deca Durabolin offers unique protection to hair follicles on the scalp and helps to reduce pimples.
Deca Durabolin (nandrolone) was a bulking steroid commonly used in the Golden Period,
alongside Dianabol. Failure to go away gaps like this in-between cycles, in our
expertise, can lead to permanent damage to the HPT
(hypothalamic-pituitary-testicular) axis. Bodybuilders additionally stack trenbolone with Anadrol; however,
this ought to be viewed as highly toxic and an pointless stack for most users.
The potential carcinogenic effects likely occur by way of
a hormonal mechanism quite than by a direct chemical
interplay mechanism. WINSTROL (anabolic steroids) is indicated prophylactically to lower the frequency and severity of attacks of angioedema.
Turinabol and testosterone are complementary compounds, with testosterone failing to pose any pressure on the liver
whereas causing fewer fluctuations in ldl cholesterol
in comparability with other anabolics. Females have solely a fraction of a male’s endogenous testosterone level; thus, solely small dosages of steroids are wanted to produce notable outcomes
and improvements in body composition. Most bodybuilders stack a
quantity of steroids (referred to as “stacking”) in order to profit from varied traits of each.
For instance, stacking Testosterone with Deca Durabolin or Trenbolone Cycle Duration
can present faster and more steady gains.
When women take Anavar at 10 mg per day, we frequently see them experience muscle positive aspects inside the first 10 days.
A lady taking 10 mg of Anavar per day has a more highly effective effect than a man taking 20 mg of Anavar per day.
This is due to males producing roughly 20x more testosterone in comparability with women (24).
Amongst AAS users there’s the assumption that AAS would possibly trigger gynecomastia through alternative
pathways, similar to elevated progestin action on the mammary
glands or elevated prolactin ranges. While gynecomastia can develop in patients with hyperprolactinemia, the condition arises secondary to the gonadotropin suppression prolactin may cause (203).
Such practice must be discouraged as a end result of it is illogical and produces possible side effects corresponding
to cardiac abnormalities or arrhythmia. Elevated progestin action on the mammary gland
can also be most unlikely to be a cause of AAS-induced gynecomastia.
No anabolic steroid can ever be thought-about safe to use by anyone.
These hormones were created to deal with medical issues at very low doses.
When it comes to females, anything above the lowest dose is undoubtedly going to lead to virilization signs developing as well as
risks to the liver and cholesterol. Winstrol, subsequently, is comparatively protected to use at very low doses and for short durations, however there will
all the time be an element of danger. It’s well-known that oral steroids are particularly
harsh on the liver. Winstrol is unique – firstly,
it comes in each oral and injectable forms, and you would possibly
think it’s an easy choice; then, use the injection and avoid liver dangers.
Men produce testosterone in their testes, whereas women produce testosterone of their ovaries.
Today, Anavar is unlawful for recreational use in virtually
each nation on the earth, except Mexico, where it can be
purchased at an area pharmacy. We have had Anavar users report giant pumps, often in the lower again, being uncomfortable or painful.
This can usually feel like a locking, cramping sensation inside the muscle that can last for
a number of minutes or hours.
Dangers and unwanted effects can range from
gentle to severe and will embrace liver stress and
hormonal imbalances. Educating oneself concerning the safe and proper use of
those potent compounds is imperative for anyone considering their use.
Oral steroids have climbed the ranks to turn out to be a cornerstone in treating a slew of medical circumstances, ranging from asthma to cancer.
They’re highly effective, they’re potent, and they promise vital results.
I’ll think about NPP and Anavar here as a result of I already coated Winstrol, Primo, Tren, and Masteron above.
Testosterone is the steroid all of us come again to as a end result
of it works and does every little thing you want, and
it’s the one steroid that the majority of us will need
to use for a continuing interval, with a cycle lasting many months.
A normal error is to imagine that the half-life of a steroid is
a agency and unchangeable number. In some circumstances, you will notice a range of
hours and even days estimating a half-life as a end result of individual
factors like metabolism will always cause variations.
For users who are not concerned about their well being, trenbolone and Winstrol could produce the most effective results.
There are varied steroids that might be taken to realize this goal;
however, every has its own professionals and cons.
Extra specifically, gynecomastia results from an absolute or relative deficiency of androgenic, or absolute or relative excess of estrogenic,
motion on breast tissue. A number of situations that have
an effect on the levels or actions of those sex hormones can therefore cause
gynecomastia. Not surprisingly, gynecomastia is a
side effect that may occur on account of AAS use. In an uncontrolled multicenter contraceptive efficacy examine, 271
men acquired 200 mg testosterone enanthate weekly for at least 6 months (202).
Anavar will boost your endurance to an extent, with a noticeable capability to work out for longer and at a
higher intensity22. This is invaluable whereas slicing, where you’ll want to push your
self with cardio exercises to burn fat. Like all AAS,
Anavar will positively have an effect on your restoration, dashing up
tissue therapeutic. With its identified benefits on collagen synthesis (after all, Anavar was initially
developed to promote healing), it could possibly scale back soreness and ache post-workout.
When utilized as an adjunctive therapy for feminine
breast cancer patients, the dose is ironically typically much higher for such functions, in the vary of 10 – 40mg day by day.
The SteroidsLive blog covers the latest information in bodybuilding, fitness,
sports activities, well being and diet. We try to give our
readers — athletes, fitness and sports activities buffs, and
those excited about all-around health — the newest news,
data, and of course — the gossip.
As An Alternative, it may be stacked with testosterone or Dianabol for increased muscle gains.
However, you wouldn’t typically stack this as your first steroid cycle
but quite as a later cycle. This is as a outcome of Dianabol and testosterone are harsh enough by themselves for a beginner protocol.
Due To This Fact, if a newbie desires to construct
lots of muscle during their first cycle, Anavar isn’t the solely
option. Nevertheless, Anavar is a wonderful choice for those looking for to gain muscle mass and burn fats concurrently.
This is very true for newbies preferring to keep away from needles and are concerned in regards to the potential unwanted effects of steroids.
Most Masteron customers will also see the next enhance to the libido than is often skilled
with Anavar. On the draw back for Masteron, it dries out the joints and might trigger joint ache, whereas Anavar could be joint
supportive to a degree. Once once more, if you’re delicate or do not wish to threat it,
stick to the beginner plans listed above. As milk
thistle is extremely helpful for liver well being and performance.
As A Outcome Of it’s nonetheless thought-about one of the
best oral PED currently on the market. If you want an concept of how effective Winstrol
may be, there are rumors going round that Zac Efron favored this steroid when he was prepping for Baywatch.
With oral Anadrol nonetheless, these side effects disappear virtually completely.
It was by no means meant to be a fat-burning agent; instead, it was researched and used medically for its
benefits for respiratory circumstances like asthma. You can get away with stacking orals together – for instance, Anadrol
and Winstrol. I nonetheless largely prefer injectables to
avoid hepatotoxicity, Anavar being one exception. But should you don’t like injecting, then orals are still a perfectly viable possibility.
General, the article goals to supply novices with important information to make knowledgeable decisions
and approach steroid use responsibly. In the ultimate weeks of your
cycle, Winstrol helps minimize fats whereas preserving your muscle tissue
intact. Like many of the best steroids for
beginners, Winstrol additionally offers the benefit of boosting red blood cell production, which improves oxygen-carrying capability and
endurance. This facilitates the constructive nitrogen steadiness that
is essential for muscle improvement to further boost muscle
growth. There is also something to be mentioned about combining
an Anavar dosage with caffeine. One examine has demonstrated that simply 300mg
of caffeine administered alongside Anavar increased
subjects’ blood plasma levels of Anavar by
15 – 20x in comparison with baseline levels[10].
I at all times say it’s price sacrificing a number of kilos in gains to get those unwanted aspect
effects under management with a barely decrease dose.
The elective dose for YOU might be different than for me, however 40-50mg is the place lots of males discover one of the best
balance. Deca Durabolin, additionally known as Nandrolone Decanoate,
is a high injectable steroid. The decrease in FM of 1.73±2.seventy seven kg
within the sufferers receiving oxymetholone is also in keeping with androgen’s
recognized lipolytic results (21). There had been no vital modifications in consumption of daily total calories, and the reported day
by day physical activity did not change considerably.
Females who develop virilization are always advised to stop use instantly so those effects
can subside and disappear. Proviron, as a outcome of it being an oral steroid and failing to transform into estrogen,
ends in significant will increase in whole cholesterol (with HDL
ranges reducing and LDL ranges spiking). Thus, research have
proven that Proviron could cause notable increases in blood pressure (6).
References:
PedsElite
**mitolyn**
Mitolyn is a carefully developed, plant-based formula created to help support metabolic efficiency and encourage healthy, lasting weight management.
References:
Casino montelago
References:
https://www.busforsale.ae/profile/susanne806540