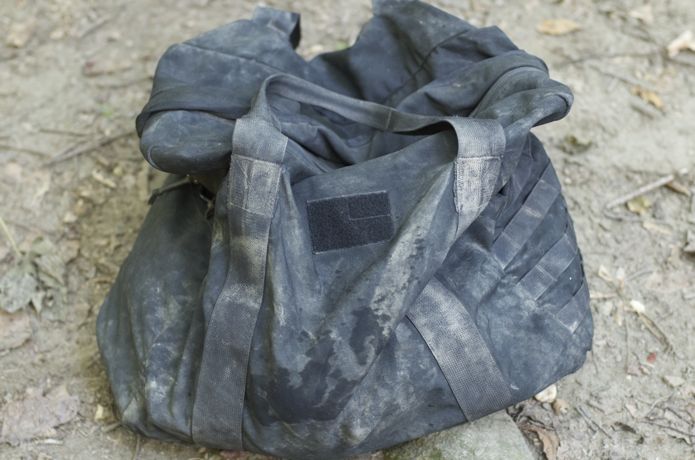
The aviator’s kit bag was one of my favorite pieces of gear, and everyone on my Special Forces team used them to transport a small army’s worth of gear, per person. The wide opening makes them far superior to green Army duffel bags, which nobody uses anymore because nobody likes soup sandwiches at the bottom of a long, narrow bag. But because the aviator’s kit bag was designed for one purpose and one purpose only (airborne operations), it falls a little short when used elsewhere. So we at GORUCK decided to modernize it and do it in two sizes, mil to indicate a larger military sizing, and civvy to indicate smaller civilian sizing. We added all the functionality the guys and I always wished they had – not for jumping, but for daily use, travel, and storage. And in that process we abused kit bags like it was going out of style.
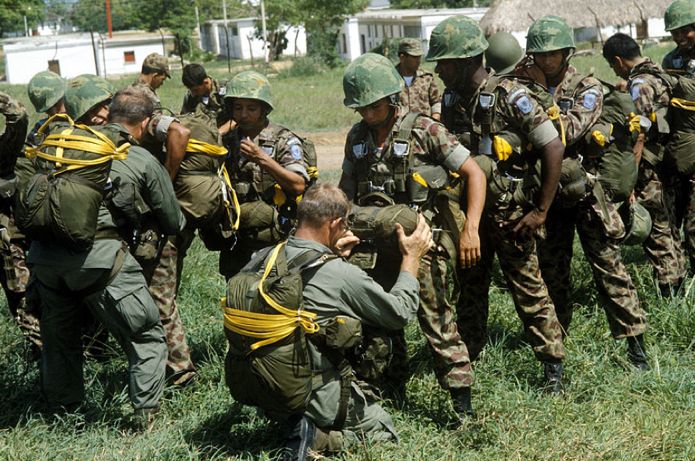
The kit bag’s original usage dates back to paratroopers performing airborne operations, aka jumping out of planes. Above, Green Berets are inspecting their Colombian partners prior to a jump. When you jump, your parachute harness is on your back. In this picture it’s the green backpack with the yellow ripcord on it. The Green Beret in the foreground is inspecting a reserve parachute on the Colombian paratrooper’s front. And underneath that reserve rests an aviator’s kit bag. When a jumper lands, assuming bullets are not flying, the jumper’s first task is to disengage the parachute harness and begin to roll the parachute toward him or her. Then the jumper stuffs the parachute into the aviator’s kit bag and exits the drop zone. See an illustration below as well as the official drop zone procedure as taught in Airborne School.
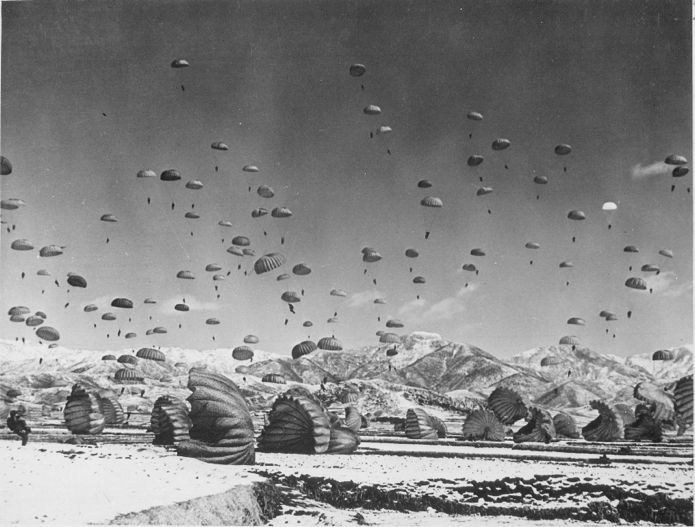


You always get off the drop zone quickly to reconsolidate elsewhere. You grab the straps and rest your stuffed kit bag on your shoulders. It’s pretty awkward, but you do not carry it for any great distances, which meant that in the design (as with most Army things), comfort was not a factor. Suck it up type stuff. In the picture above, it’s a different kind of suck it up because it’s from a GORUCK Challenge where I used the class to field test what we thought (and hoped) was the final prototype.
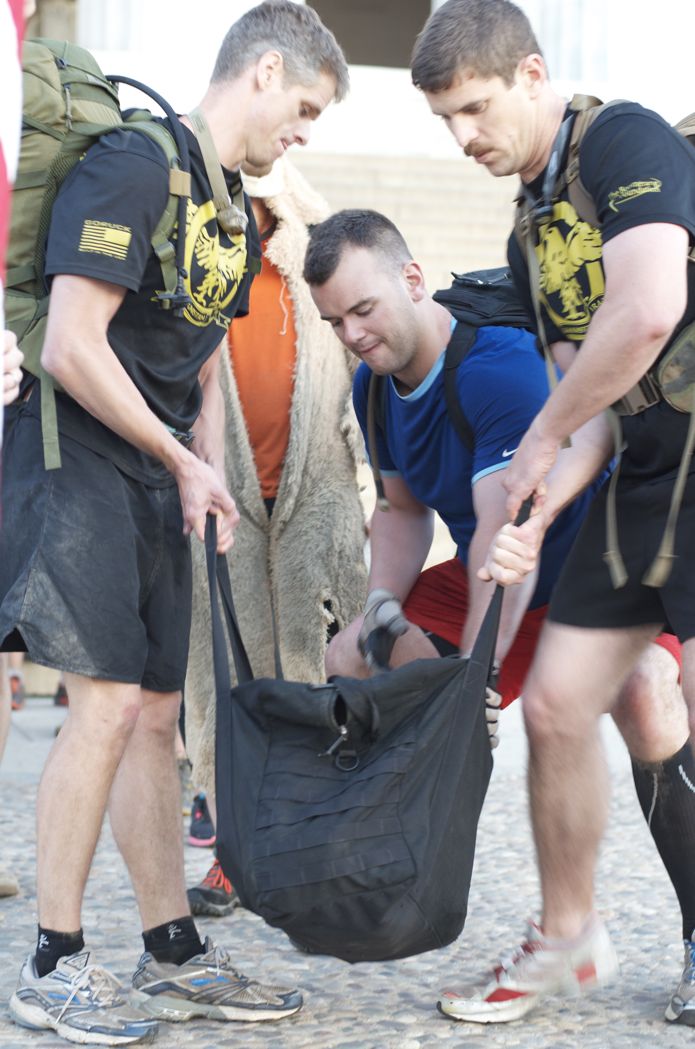
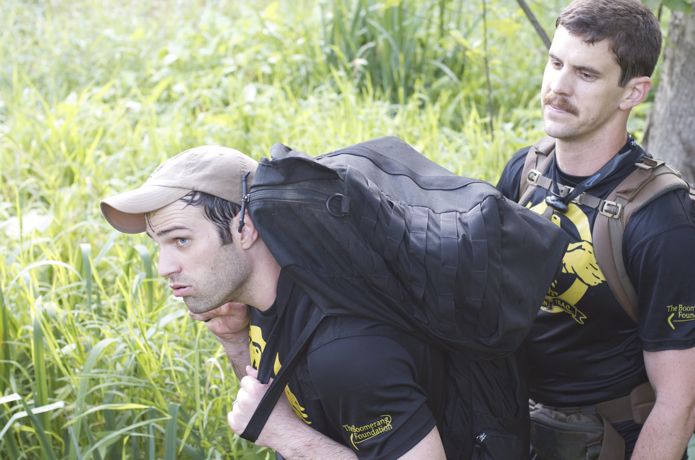
The GORUCK Challenge was a vital part of our process to make the kit bag better and more functional. At the start of this Challenge, I told them to fill it up. With what? someone said. (Stupid question). Stones, rocks, dirt, sand, whatever. It better be heavy, and you can never, ever let it touch the ground. Besides being a great way to force teamwork, this allowed me to make sure that stress points were properly reinforced, and to test out the length and configuration of the straps. Making the straps longer was a no-brainer, it was just a question of how much longer. Too long is sloppy, but you still want to be able to carry the bag over one shoulder, which is impossible to do with the old kit bags. The old aviator’s kit bag was supposed to be as simple as possible in an attempt to decrease its bulk. After all, you have to jump with it under your reserve parachute, so in that case less bulk is a better thing. In terms of function, though, it’s not as good because it meant really short straps, no pockets, stuff like that.
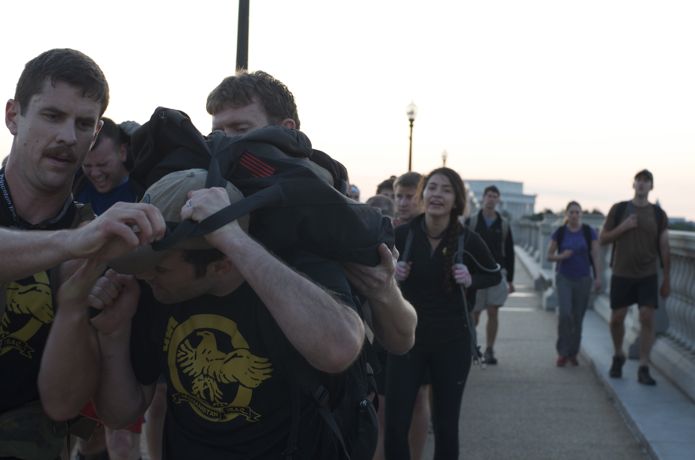
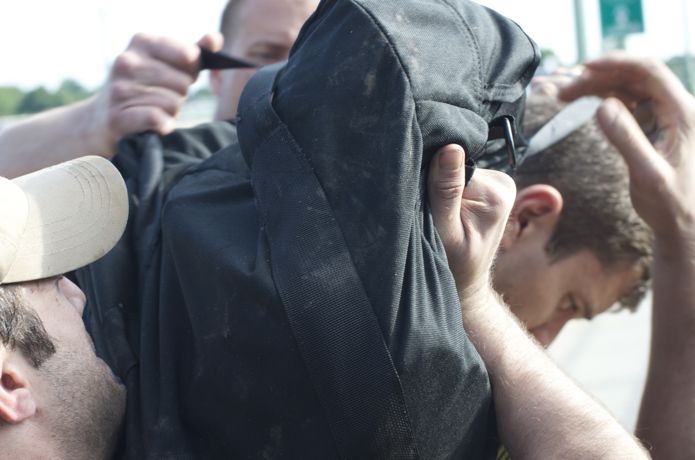
The black civvy kit bag they filled up ended up weighing about 100 lbs. The only restriction I gave them was to never let it touch the ground. I saw how awkward and heavy it was, and I knew they would have to rotate it often. Which pretty much meant that they would grab every spot on the bag every which way. And in situations like this, people always do what’s most comfortable for them, which is always what’s worse for the bag. But that was the point. If you want to find out what someone’s made of, see how they handle stress. Same with gear.
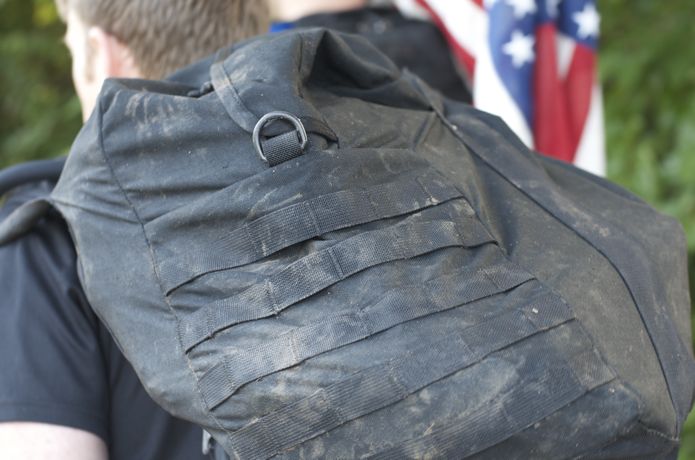
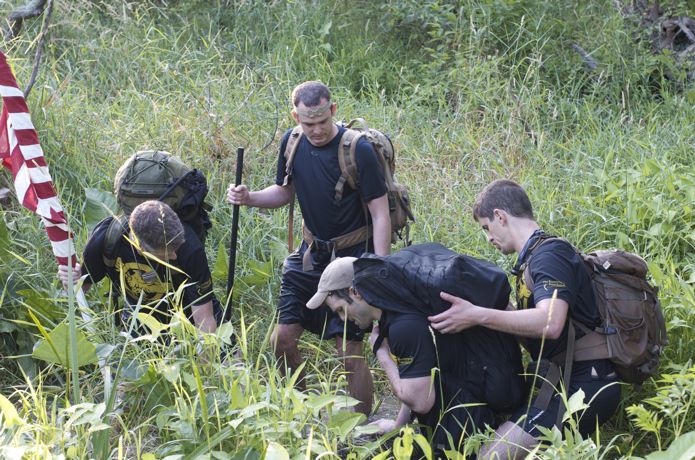
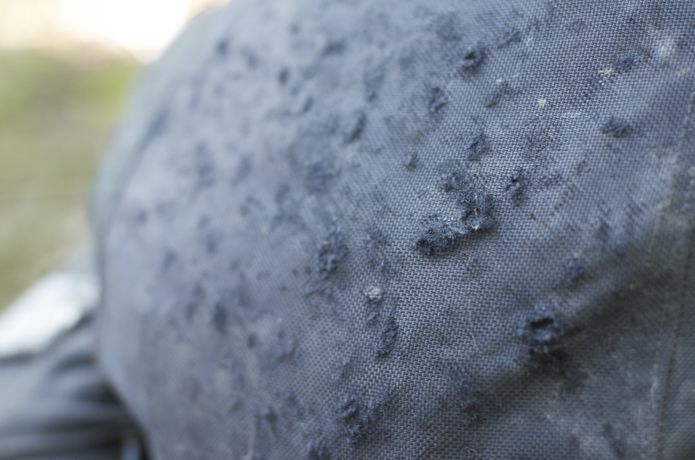
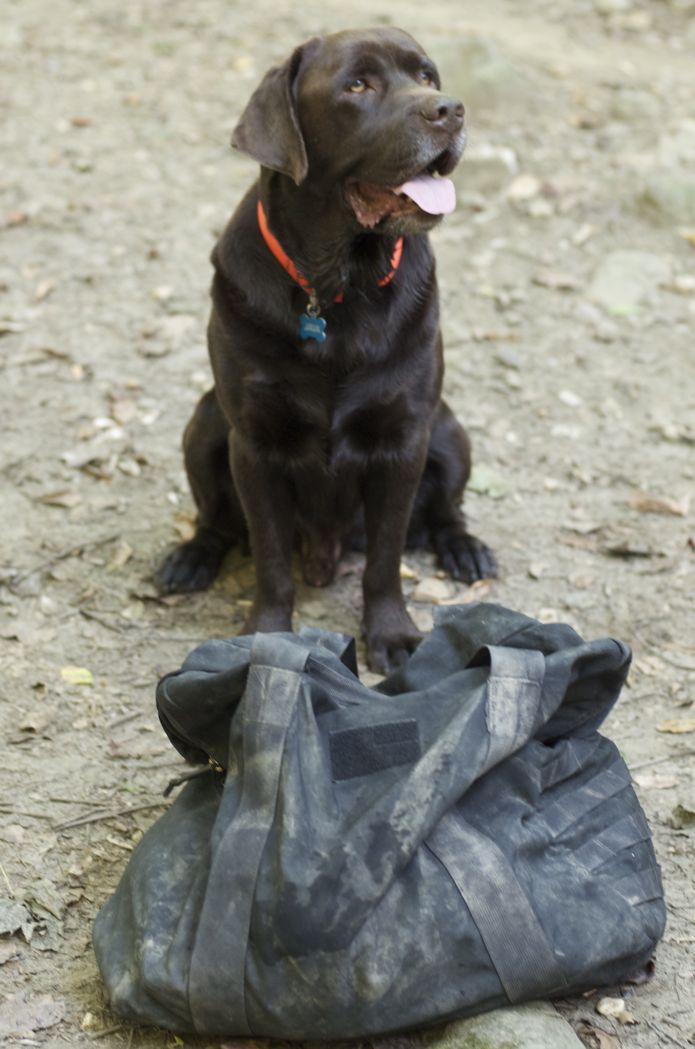
Jagged concrete, stones, and rocks punctured the kit bag in multiple locations, primarily through the bottom where all the weight rested when carrying. Our kit bag is made out of 1000 Denier Cordura, the same material as our rucksacks. We reinforced the bottom, which suffers the most abrasion. But the picture above is proof and a disclaimer that if you fill it with 100 lbs of what this class carried around for 13 hours, the fabric will show signs of wear. And below another disclaimer: if you do this, your face probably will, too. God bless the Challenge takers.
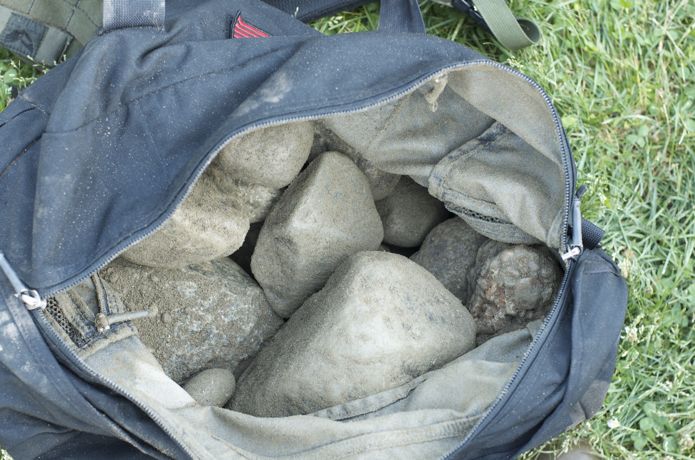
This was the final Challenge for kit bag prototypes. At the end I opened it up to show them all what they carried for the last little slice of forever. Then I got their feedback — after all they were the ones who lugged it around. Interior pockets did not really factor into it, but the guys in this class who have used the old kit bags loved that ours has three internal pockets, one external and some MOLLE webbing on the exterior as well. All three interior zipper pulls are red, a feature found in Special Forces medical packs, which makes the pulls easier to find when it matters. Here they’re completely caked in mud, go figure. The pockets are not ideal for organizing rocks and stones, but they’re great for other stuff. The old aviator’s kit bags do not have any pockets at all. But the main thing the class talked about with our kit bag was the straps. Specifically their length and the stitching that created the handles. More on that later, up close.
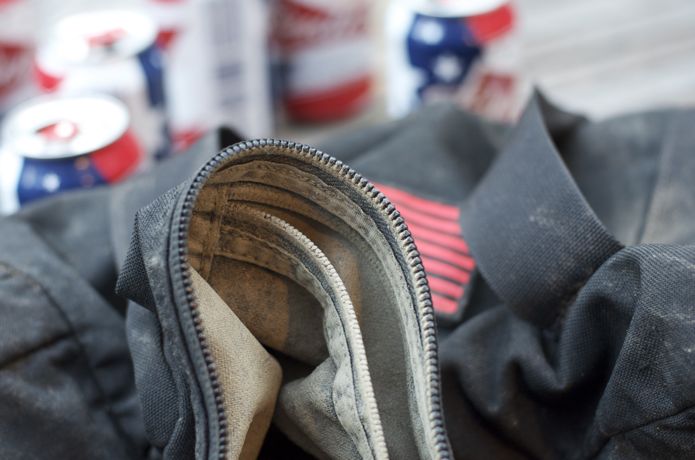
After everyone in the class was sick of talking gear (and probably me in general), I took the bag back home and examined it up close. A few energy drinks aka Bud heavies later and I was confident it was ready to go, meaning move to production. Which, incidentally, was a surprise to me. Again, it goes back to the stitching on the handles. Chris (don’t call him Donnie he hates that) was in this class before he became Cadre. It’s part of the Cadre hiring process to do a Challenge, then shadow, then lead. If your stand-up act is funny and builds teams, you’re good to go. Eventually, with the Challenge behind us I grabbed him and Java so we could illustrate some of the main takeaways. Which meant he was carrying, I was documenting.
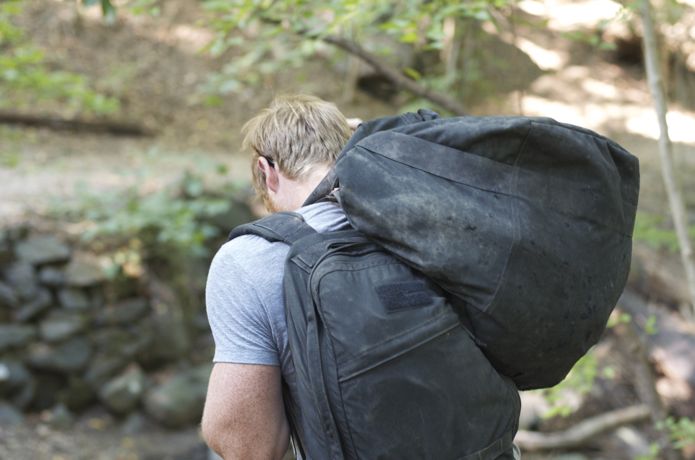
Chris don’t call him Donnie he hates that’s first reaction when he picked it back up came in the form of a giant boo-boo lip. He said it was so horrible it’s like a flashback to the RTL (Resistance Training Lab) where you’re beaten and treated as a POW in SERE School. Then he took it further, as he usually does, and said with a smile of disgust that it was the worst thing he ever had to carry, or do, counting all of our training (he’s also a Green Beret). I said you gotta be kidding me, and he said that because of how heavy and awkward it was, it was horrible. Chris don’t call him Donnie he hates that loves the word horrible and uses it every time the word awesome just won’t do. I said it was probably just fresher in his mind, but then he remembered tank treads (treading water with fins and two air tanks on your back) from Combat Divers School, and admitted that was worse. The kit bag = awesome, tank treads = horrible. It’s all relative.
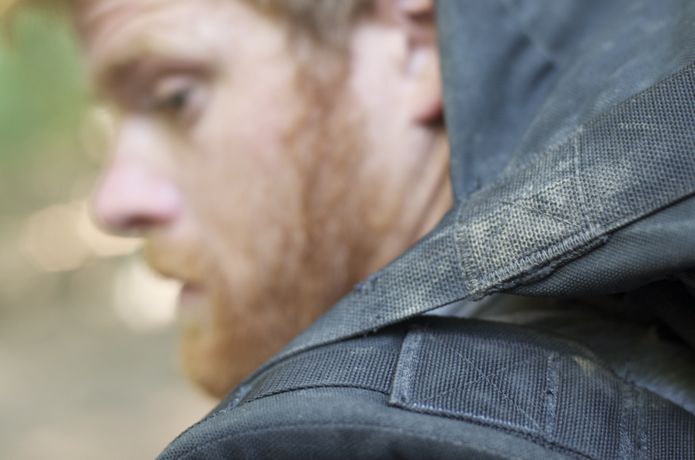
The ziz-zag stitches on the kit bags and all the rest of our gear are called bartacks. We only use these on the high stress points, and they require a special, industrial grade machine called, you guessed it, a bartacker. For instance, the point where the webbing straps connect to the body of the kit bag itself – full of bartacks because people end up pulling on them every which way. In an ideal world for most manufacturers, people are gentle on bags and don’t use them the ‘wrong’ way. Unless their plan is that you break them and buy more, I don’t know. The point is that we assume (and hope) people are too busy living their lives to want to worry all the time about whether their gear will fall apart. We want you to take our gear for granted. The reason we’re confident about our gear is we spend 95% of our time on the last 5% of the development process, then we see how it holds up in the Challenge. We examine stress points, where we may have to adjust strap placement, where we have to bartack extra. Stuff like that. It’s a constant process that reduces problems later on down the line. And because we care deeply about making the best (and doing it in the good ol’ US of A) and we offer a lifetime guarantee, we cannot afford to make stuff that fails. All that said, because humans build all of our gear, there will be a small percentage of errors. Humans work that way. But we’ll always make it right, and if we don’t or you’re not satisfied with anything at anytime, never hesitate to let me know in the comments section.
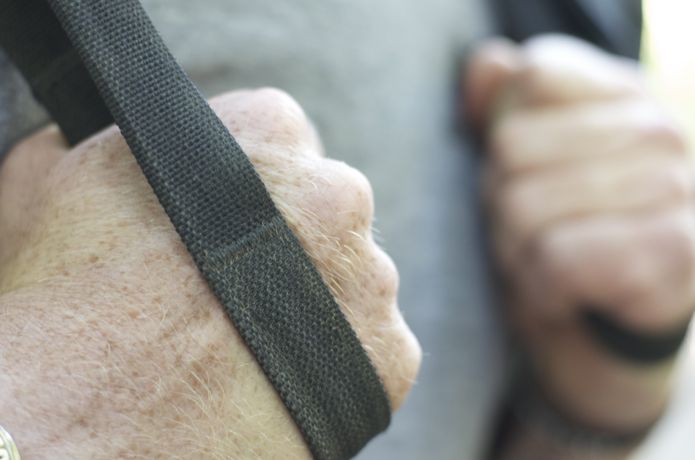
The carrying straps. This was one of the features we wanted to improve. The webbing we use is as durable as it gets. But after a lot of use, if left to its own devices it will bunch up in the area where you grab it. Thus becoming a sloppy gypsy camp in its own right. To counter this, our thought was to create a crease that defined the area you would grab to carry it. In essence, a handle. And then bartack that area down at its ends (pictured above). I was very skeptical that this would function properly, but in the end, the guys in the Challenge loved it. They said it made the entire bag easier to grab, and that having an area lie flat in their hands instead of bunching up made all the difference. My thought coming into the Challenge was that the class would confirm my assumption that these were irritating. But I was wrong and Jack was right and we kept the handles exactly as they were.
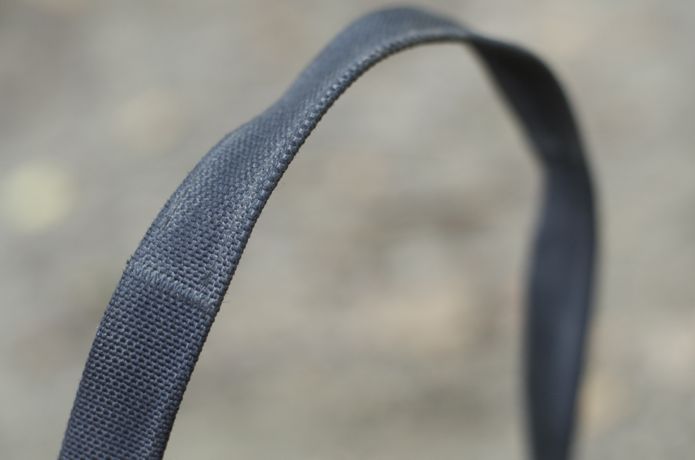
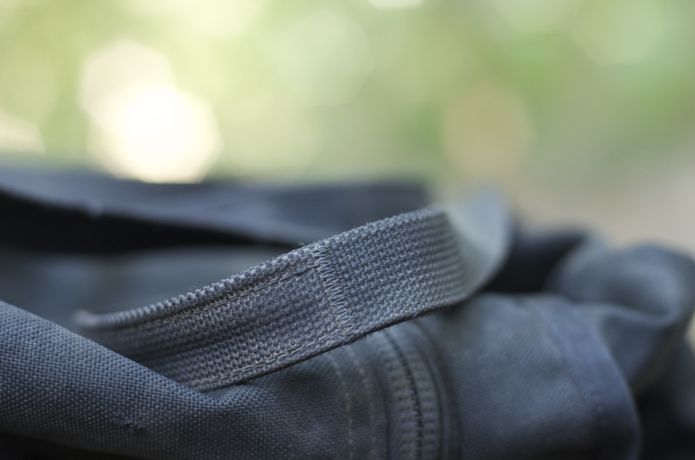
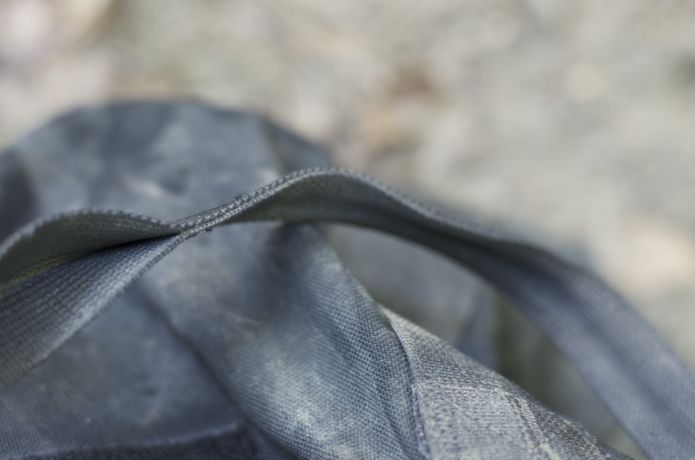
One of my worries, above, was that dirt and mud would find its way into the area right before the handle started. But after all this bag went through, the Challenge proved my fear unfounded.
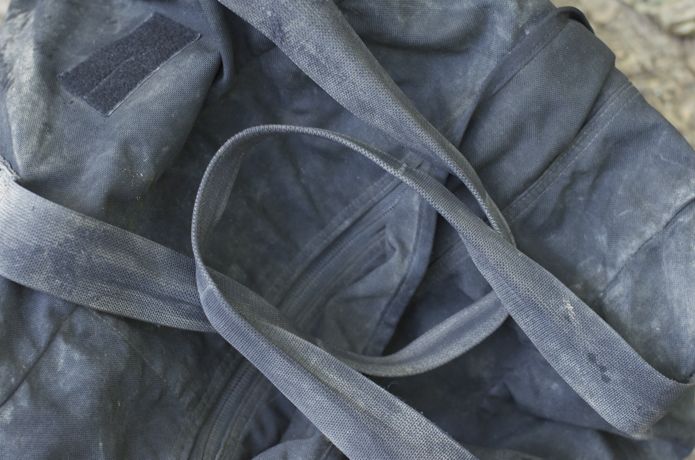
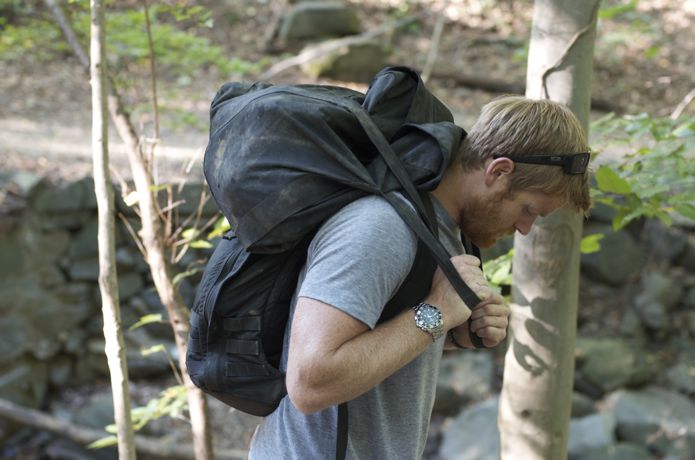
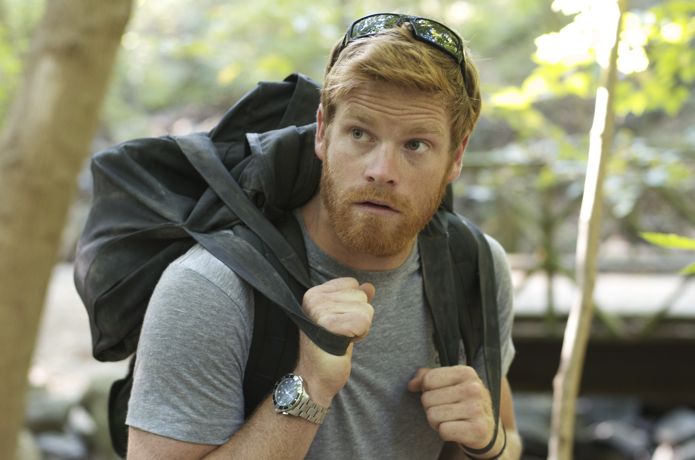
The configuration above takes me back to Camp Mackall. When you show up for every phase in the Q-Course (there were 6 when I went through), you have a ruck and a kit bag. You do a layout of all your stuff, and then they give you a tour. You already know where everything is, and you don’t need a tour, but the point is that you’re lugging all your gear around for a couple hours, for a couple miles, and it sucks. I always had one of the old kit bags – and because the carrying straps were too short, circulation would stop at the elbows and my hands would go numb. I constantly had to shift the positioning of my bag, and my ruck, while they were showing me where the chow hall was even though I’d eaten there a hundred times. As Chris don’t call him Donnie he hates that would say, it was horrible. So no matter how you carry our kit bag, no matter where you are or what the tour is, longer straps help.
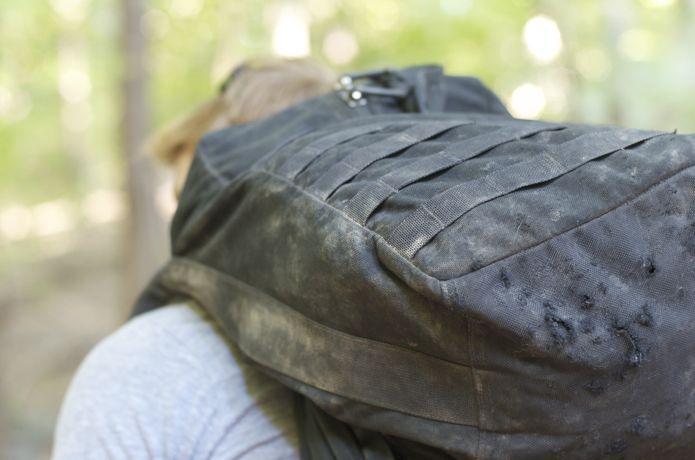
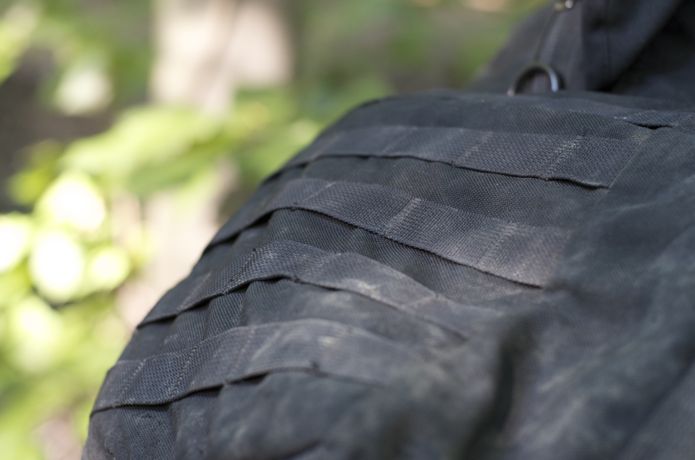
The old kit bags have no exterior pockets. We added one external pocket and, pictured above and below, one section of MOLLE webbing to the side. The day will come when we have a lot of accessory pockets that will integrate with this. For now, though, it’s just a foundation. You can build on top of it or just leave it. Your call, as always.
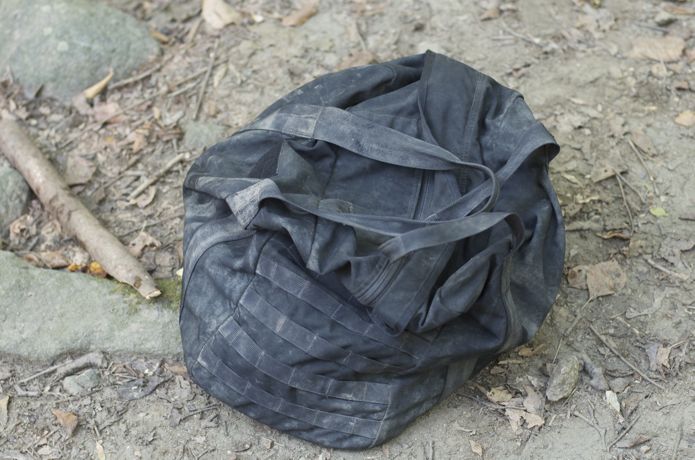
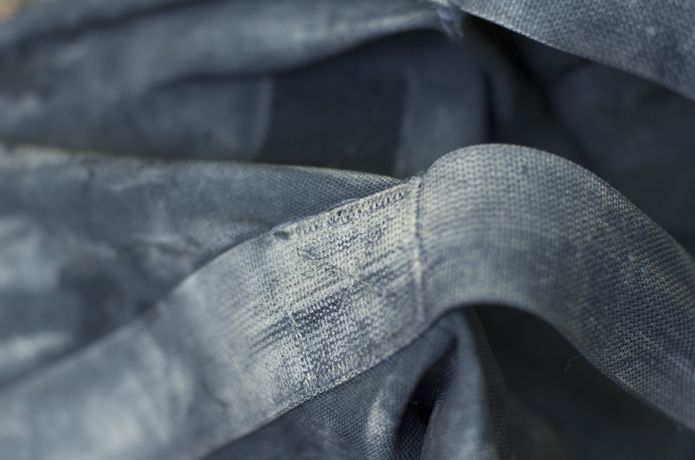
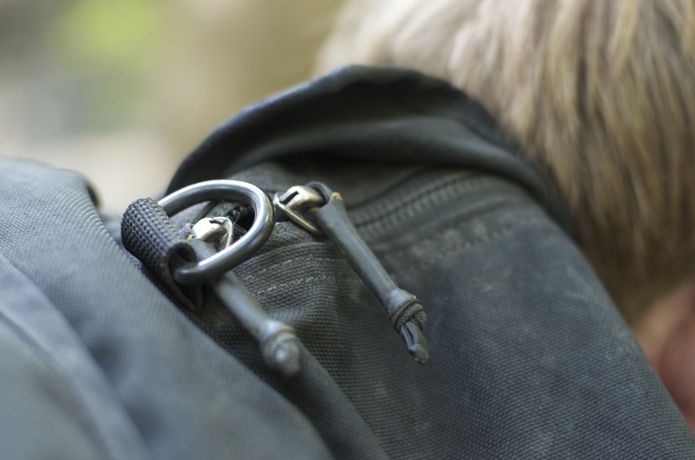
It’s a dirty world and our gear thrives in that, but if you want anything in life to last, every once in a while you gotta clean it off. Check out Cleaning Rucksacks Explained. Basically, over a long time dirt will attach to fibers and threads and weaken both. If you hose down the kit bag’s exterior, then flip flip it inside out and do the same thing, that’s about right. Zipper chains (below) are made up of metal pieces held in place with a series of threads, and are always the weakest parts of any bag. The threads specifically, and removing any dirt or mud helps prolong their lifespan. If you’re feeling extra motivated, use soap while you’re at it. I talked about gear maintenance in Wrapping Bricks Explained, but the summary is that no gear is invincible and it’s up to you to take care of yours.
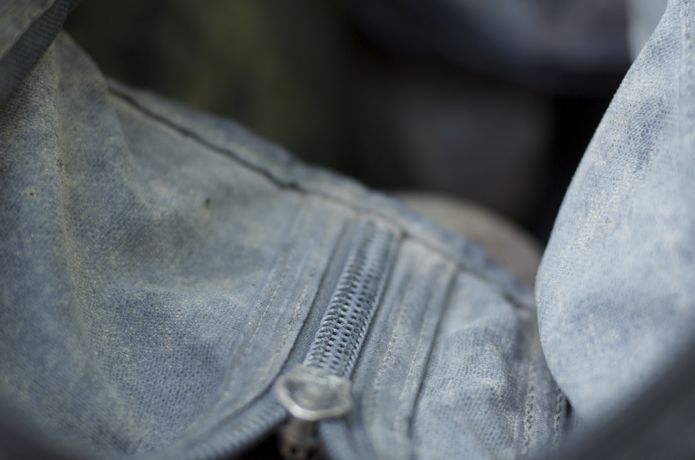
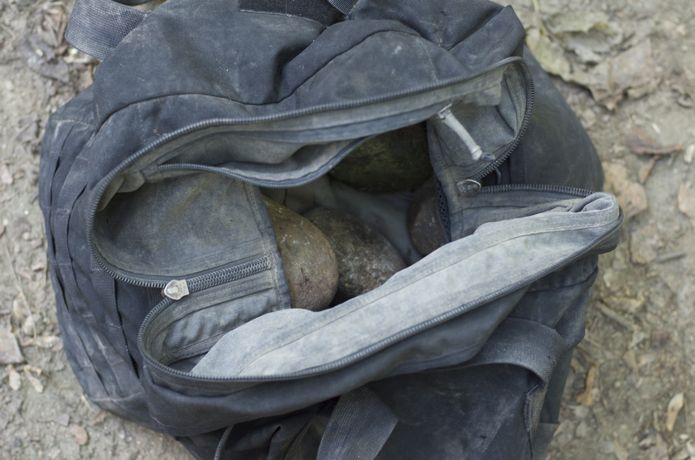
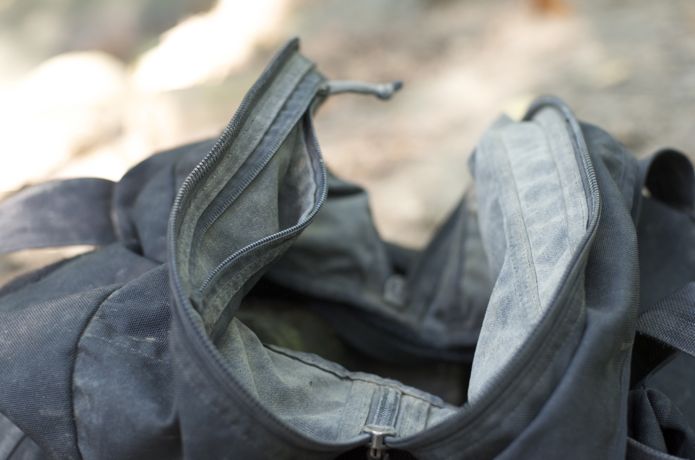
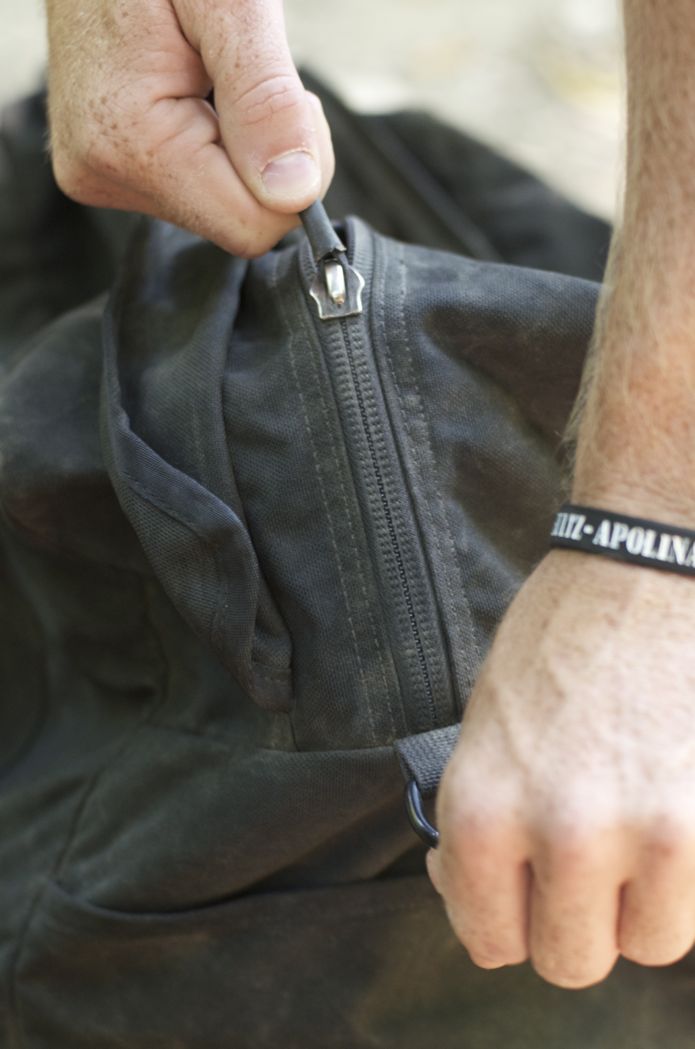
The small metal D-rings at both ends of the zipper (above and below). We fought about this for a couple prototypes – I kept championing the movement to get rid of them, which is usually my M.O. The idea that someone would see these and want to attach a sling drove my thought process. Please never do that. The bag is too big and too heavy (no matter what you’re carrying), and a kit bag is not meant to be a messenger bag. But the functionality I eventually saw in the D-rings was that they really help when you’re opening and closing the bag. So we kept them.
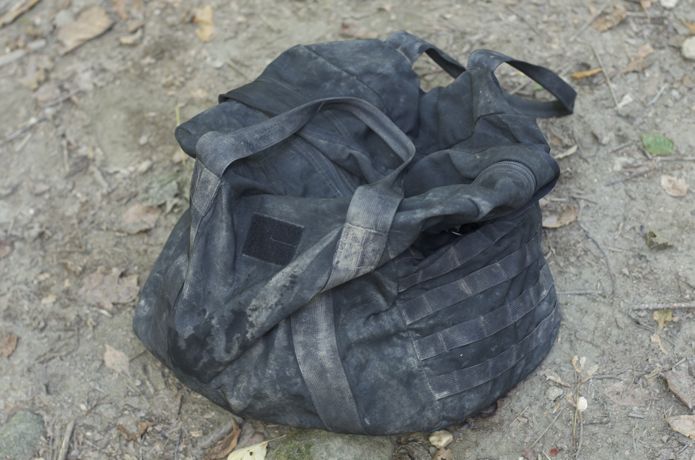
Thanks to Chris don’t call him Donnie he hates that for being a good sport. Now, would you mind setting that kit bag down one more time. Now pick it up one more time. Thanks again. And I could have had fun doing this all day just to hear about the horrible and the awesome, which is a form of entertainment much like beer in that it makes the world go round with smiles. But then Java got tired of not being the center of attention (he’s complicated like that), so things happened involving long distance movements and squirrels and we called it a shoot. Click to check out pictures of cleaner Civvy Kit Bags and Mil Kit Bags, and of course you’ll find Java in there a bunch of times, too.
Looks excellent and your product development process always makes for a good read. I’ve already ordered one!
Top notch post. How many Bud cans do you think one could fit in the civvy?
Jason, love the civvy bag and may have to pick up one myself at some point. Just a thought, if you’re worried people will use the d-rings for a shoulder strap (as was my thought) perhaps a loop of fabric or pull tab will serve just as well?
Anil, we actually tried that. The loop had to be excessively big to get your finger through it (which looked sloppy) and for whatever reason a pull tab was kinda hard to grab. The second part of the debate we had on using the D-rings was which kind we should use. A new supplier sent us all the specs on this plastic one, told us it was the greatest thing since sliced bread, etc. We also requested a metal one, though. Then Jack pulled out the hammer and shattered the plastic one with only a minimal strike. So metal it was.
Thanks for the prompt response Jason, I agree,metal was definitely the way to go. Can’t imagine a pull tab would be useful when you’re covered in challenge related grime either.
I have to admit I’ve wondered why you do the things you do with your products. Usually I’m enlightened once I actually try them out for myself.
Am waiting on my replacement GR1, don’t think I’ll be using rocks to break it in though.
Outstanding piece of gear–can’t wait to get my hands on one. One question: is the main compartment zipper lockable, say with a small luggage cable lock? Given the overall sizing, no doubt some airlines will require that you check your kit bag.
Clay – yeah, if you stuff it 100% full it technically won’t meet carry-on measurements, but it’ll still fit in the overhead bins and no doubt you could get it on anyway. It looks more discreet and smaller than half the suitcases people carry-on. On the lock question, you could use a very small luggage lock, putting it through the 550 cord but beneath the cover on the pulls. If you want to use a larger lock, you would have to strip off the actual covers for the 550 cord pulls.
Is the kit bag that Cadre Christopher Donnie Tin Tin carrying in the pictures the mil or the civvy version
Is there a laptop pocket? Can’t tell.
I see what you did there – 1000D Cordura Kit bag = soft-sided cooler.
Me like.
Brian – Chris don’t call him Donnie he hates that is carrying a Civvy Kit Bag, Black. Same one that went through the entire Challenge. Dave – no laptop pocket or sleeve in there. There wouldn’t be enough padding to support it even if there were. Thanks, guys. And Scott — yeah, we’re subtle like that.
Jason, if I wanted to get into contact with you directly to feedback on the service I’ve been receiving what’s the best way to do that? Facebook?
thanks.
Yeah, bud, here’s my FB account: https://www.facebook.com/mccarthyjasonj
Cadre Chris may not like to be called Donnie, but some things he DOES like: small neck Nalgene bottles and SF captains.
Great explanation, as always. Love my gear and explaining it to people everyday.
Curious why, in some of the shots above, the guys going through the challenge aren’t using GoRuck bags?
You’re allowed to use whatever ruck/pack that you want in challenges now.
Jason, thank you for the prompt response regarding locking the Civvy Kit Bag. Running a small cable lock through the paracord will of course work (I do exactly that with my GR1) but I’d be worrried that a domestic terrorist (AKA Airline employee) could stil cut the cord and access the bacg’s contents. Of course, you can pretty much overcome any zipper with a ballpoint pen, so I really shouldnt give it much thought. A zipper with a slightly larger elet would solve the problem, tho. I’ll have a look at my bags zippers when I receve the bag (ordering one this weekend) and see if a mod is possible.
As for carry on, you are right–civvy bag should fit in the overhead of most domestic airlines no problem.
Thanks again.
Jason, quite positive you may have just concocted the best “Dad Bag” available on the market today. Granted, the GR-1 works well, but something tells me this will be far better for what Mom claims the little one can’t be without during our trips. Dads often violate Rule #1 with all the baby hauling junk on the market today, and clearly, it’s only because we aren’t given the option of better gear. Saving up for a Civvy Kit Bag ahora mismo. Review to come.
Civvy in Multicam????
I’m holding out until that happens.
TC
Messenger bag, did I see a mention of a messenger bag??
Looks very interesting. Could you explain in a bit more detail why you went with this design vs a typical duffel bag? When I heard you were doing a kit bag I thought it might be your version of a duffel. Just curious. Thanks.
Bryan, duffel bags (as you see them on the street now) are not a part of military issued stuff. However, kit bags are used by everyone, including me. So I knew exactly what was good about the kit bag, and what to improve because I used them for years. I got used to kit bags, and I prefer them to duffel bags. It’s also the same sort of reason why I wanted to start GORUCK out with a rucksack (GR1) — because I had a ton of rucks when I was still serving, and I knew how to make them all better.
Jason-
Just got my GR1 and freaking love it. Awesome job!
I want to get the whole array as my luggage but I have one concern about the civvy bag. It’s been mentioned before and it’s my main turn off about the Civvy Kit Bag and that’s the ability to really lock it so I can check it.
You mentioned putting a small lock through the zipper pulls but that’s no real deterrent because the 550 cord can be so easily cut.
I know that YKK and others make zipper sliders with an integrated metal loop through which you can slide a small lock so that the metal of the sliders themselves are locked together, and not just the pulls. Is that something you guys would consider putting on the bags?
Yes, Don, I’ll look into it now. Thanks for the feedback, and the recommendation.
jason,
so are there three pockets inside the bag? one on each end of the bag, near the d-rings and one in the middle of the bag.
thanks.
yes, sir. 3 total internal pockets. two larger ones on each side of the interior plus the top closed pocket that has the logo sewn onto the top of it.
Jason, will you keep us posted on the possibility of the “luggage” zipper pulls. Will order a Civvy either way, but will wait if you change to a new zipper pull. Thanks.
I still have my kit bag from the USMC. It has had a few grunt patchwork jobs done to it. There were a lot of failure points and deployments seemed to expose them. I loved that thing. I’m going to have to buy this. Dammit! More money gone.
Jason, I just e-mailed a picture of the type of zipper pull we are talking about–In the meantime I think I might try making the eyelet on the current pull slightly larger (using a small drill), which would allow passage of a small cable lock. I’ll let you know if it works.
Thanks again for creating a great line of outstanding gear! My GR1 goes wherever I go.
The kit bag doesn’t seem complete without a reserve attached to the carrying handles to balance out the load while carrying the bag over your shoulders. 🙂
I hear ya, man. And don’t forget to remember that nice feeling of strangulation that happens when the reserve hits your throat. Good times.
Hey guys, just want to let you know that the eyelets on the zippers are just large enough so you can insert a cable-tie through. I did this on both zippers, tightening them to create small loops that I can use for a small luggage lock. It’s not the most ideal solution, but it works if you want to be able to lock the main compartment of this awesome bag.
Not sure if I’ve explained it properly, but I’ve uploaded some images of what I’m talking about here:
http://s22.postimg.org/fqsdshxsh/grcivvykit01.jpg
http://s24.postimg.org/prt376f85/grcivvykit02.jpg
http://s24.postimg.org/gxf7td9cl/grcivvykit03.jpg
Matt – do you have a link to what kind of cable tie through you used and all that good stuff? Thanks man, very informative.
Hey Jason, here’s the link to the cable-ties:
http://www.4cabling.com.au/cable-ties-200mm-black.html
I’m in Sydney, Australia though, so probably worth finding a shop in the US for these. The specs are 200mm x 3.2mm – you won’t need them that long because you’ll cut them down to size. They’re made from UL approved Nylon 66 94V-2.
Did you actually buy one and use it as a dad bag?
Hello! I just wanted to ask if you ever have any trouble with hackers?
My last blog (wordpress) was hacked and I ended up losing a few months of hard work
due to no back up. Do you have any methods to stop hackers?
Feel free to surf to my blog post … nordvpn coupons
inspiresensation (https://t.co/gz5Gi0YSYB)
Very energetic blog, I enjoyed that a lot. Will there be a
part 2?
my site – nordvpn coupons inspiresensation
nordvpn special coupon code 2025 350fairfax
This design is steller! You certainly know how to keep a reader amused.
Between your wit and your videos, I was almost moved to start my own blog (well, almost…HaHa!) Great
job. I really enjoyed what you had to say, and more than that, how
you presented it. Too cool!
kamagra 100mg prix: kamagra 100mg prix – kamagra livraison 24h
https://kampascher.shop/# Kamagra oral jelly pas cher
I do not even know how I ended up here, but I thought this post was good.
I do not know who you are but definitely you are going to a famous blogger if you
aren’t already 😉 Cheers!
Feel free to surf to my website … eharmony special coupon code 2025
Write more, thats all I have to say. Literally, it seems
as though you relied on the video to make your point.
You definitely know what youre talking about, why
throw away your intelligence on just posting videos to your site when you could
be giving us something informative to read?
Also visit my site: vpn