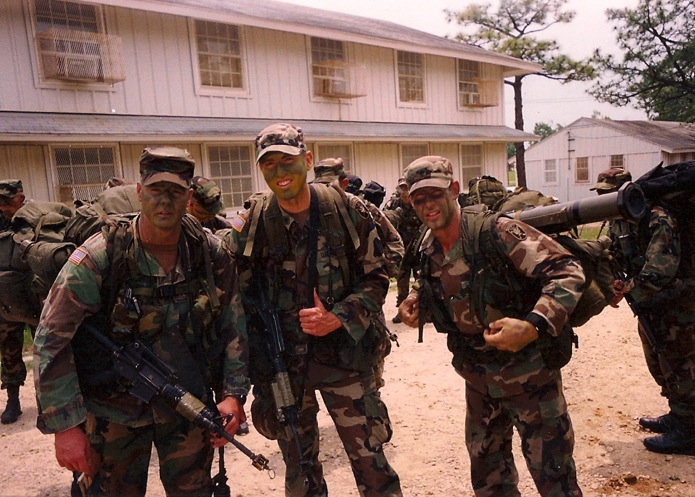
GORUCK Selection is horrible and I do not recommend it. It came about because GRT’s wanted more and Selection was our reply. It’s not in my nature and it’s not in our Cadre’s nature to put people through pure hell. I love Light and The Challenge because they’re positive events, meaning we show you what you can do as a team. Selection is not that at all and it’s only positive if you finish or if you fail and learn some form of humility. And yet here’s the deal: if you want to give it a go, I want you to succeed. This is a raw draft of what I did to train for Special Forces Assessment and Selection in 2004 and how I would apply it to our Selection if I were training for it. It would take me 4-6 months off the world’s radar to train up properly. There’s no science to this plan and there’s no wiggle room for failure – translation: get your body ready and your mind right. My goal was to join Special Forces and I sacrificed my body to do so and so does every guy who passes. It hurts and your body suffers and it’s worth it.
Thesis: Ruck More
Put the miles in. It’s vital and nobody who ever quits Selection says that they rucked too much in their train-up. In fact the opposite. So don’t use the fear of over-training as an excuse to do less work. Not getting injured is important and you have to know your own body to know when to back off a little here and there. But to take on a serious event like Selection you have to put in serious miles and do serious work. There are no shortcuts.
GORUCK Selection could go 100 miles or 200 or 300 in 48+ hours. Not really but you get the point – plan for the worst because it will over deliver on the suck factor. If you can’t accept that mentally or physically, you’re not ready. Your shoulders, back, joints, and feet have to be ready for catastrophic abuse – not to mention your mind, which is the only part of your body that will formulate the words ‘I quit.’ The good news is that you can train your body to be stronger and more prepared. And in that process, you’re training your mind to be stronger, too.
Where to Start
I never rucked until I joined the military in 2003 so I had to build up from nothing. 10 miles a week at ~25 lbs. (or 20 miles a week at ~35 lbs. if you’re more experienced) is a good starting point. Continue to do to other endurance centric PT – but wean out the heavy lifting that causes bulk. The more you weigh the more you have to carry around kind of deal. Up your miles gradually by 10 miles every 2-3 weeks until you get to 40 miles/week and keep 40 miles/week with 55 lbs. on your back as the standard. I was never a competitive runner but I was around several people who were and I based a lot of my mileage around what they did. They were running max 50 miles/week and I emulated that. So when I did 50 miles/week, I did it with less weight (45 lbs.). When I did 40 miles/week, I had 55lbs. on my back.
If you face a setback or remain constantly sore or your body doesn’t heal like mine did when I was 25, slow down your progress. This is perfectly acceptable. The goal is to get to a point where 40 miles/week with 55 lbs. feels good. Then maintain it with a few shocks to the system to avoid complacency.
When I had less time, I’d do less mileage with more weight and I’d run more as a tradeoff because that way I could put more miles in faster. I cannot stress this enough, though: you have to build your body up to be able to handle more weight. If you don’t, you will get injured.
Peak at 50 miles/week with 55 lbs. If that gets easy, up the weight to 65 lbs and do less mileage ~40 miles. The trick is to mix it up a little bit. Adjust the weight you’re carrying based on your mileage for the week but know this: putting the miles in is more important than the weight on your back. And because the only way to get faster is to go faster, you need to keep track of your pace and push yourself to get faster. Becoming a faster swimmer, a faster runner, a faster rucker will help your heart do its job when you need it to. When in doubt: more miles, less weight. And go even faster if you have less time.
Heavier Weight?
Yes, you should ruck with heavier weight some of the time – in my humble opinion. Other Cadre with more experience than I have will tell you never to ruck with more than 55 lbs. I disagree but only because I’d be a hypocrite not to. In my train up to various portions of the Q-Course (SFAS aka Selection was actually easier than other phases for me), I would routinely ruck with over 100 lbs. on my back. By routinely I mean twice a month and it almost always happened on Saturdays. I’d walk slowly and carefully and it sucked and Sunday became a day for non-impact PT: yoga, stretching, or swimming. Yes, real men do yoga. At that point, my body was already conditioned to move long distances with ~65 lbs. but I wanted to feel more. With a very heavy ruck (over 100lbs), speed is not the goal. Feeling how your body reacts is. Understanding how your shoes and your feet and your gear perform is an added benefit, but the main goal for me was mental.
Our culmination exercise in the Q-Course is called Robin Sage. After jumping in (from an aircraft) with a 125 lbs. ruck attached to my belt, our infiltration lasted 18 hours. That means I carried 125 lbs. on my back the entire time, and so did all the guys I was with. The point is to say that even 100 lbs. training rucks weren’t the heaviest I would ever have to carry and I’m glad I did not limit myself to 55 lbs. prior to the ‘Sage Infil.’ And just saying those two words together brings back memories for every Green Beret who will ever read this. It sucked and it was beautiful and I hated it and I loved it.
Tapering
Three weeks to a month before your Selection, start tapering off. Go from 40/week to 30 to 20 to 10 the week of your event – all with 55lbs. on your back. Make sure to pack your ruck exactly how it will be at Selection. Know where everything is and know how to get it all quickly and in the dark with no headlamp.
Your Feet
Your feet are your workhorses and you better treat them like gold. And by that I mean your feet are always your #1 priority. If you have a 1-minute break, focus only on your feet. And while you’re focusing on your feet, focus on one foot at a time. Never take both boots off at the same time because you never know how long your break will last.
You have to prepare them for the massacre they will face. And you can do it gradually in your training. For me, it started by rucking with several pairs of good socks (merino wool) and two pairs of boots that worked for my feet. Start out rucking with thin socks. Get your feet wet at the beginning of each ruck you do. When you feel any hotspots developing through the thin socks, switch to your thicker pair of socks. If you still feel hotspots getting worse or becoming blisters, change your boots, too, putting a dry pair on. The goal is to harden your feet and develop callouses wherever your shoes or boots cause hotspots because hotspots become blisters. It’ll take time and don’t rush the process. Your feet will perform differently under more weight, so make sure they’re good to go when wet under a lot of weight for a lot of miles. At Selection, they’ll still turn into mush, but your goal is to prolong that outcome. The good news about blisters is they’re just pain and all you have to do is suck it up. The bad news, contrary to Patrick Swayze in Road House, is that pain does hurt and blisters cause the kind of pain that makes a weak mind start to utter words you never want to utter.
Other PT
I lifted weights for a couple hours a week and did some functional fitness, but I was never a true gym rat because I preferred endurance training outside. I swam, I ran, and I rucked. When I did lift weights, I never did anything for my lower body because those muscles were getting all they could handle with the rucking. The downside to doing so much endurance work is that it’s hard to maintain muscle mass. I didn’t fight it (pretty muscles don’t work anyway) but I wanted to stay strong so I did really low weight/high reps of anything upper body related. I never maxed out on anything with weights and I’m sure I looked ridiculous benching 95 lbs. at the base gym over and over and over but I didn’t care. More weight/lower reps builds bigger muscles you have to carry around with you. I stuck to really low weight or did bodyweight exercises like push-ups, pull-ups, sit-ups, flutter kicks, etc. You’ll need the strength and the endurance but when you’re going to move 75 miles in two days with at least 50lbs on your back, more body weight is not a benefit.
Your Mind
Make sure it’s ready. And knowing whether you’re ready is not for anyone else to answer. When someone asks you if you’re gonna pass, tell them you’ll do your best but in your heart say there’s no way I’ll ever fail. In my training, I wanted to know that I had done everything physically possible before I showed up. Maybe I over-trained, I don’t know – but it worked. Doing so gave me a lot of mental strength, strength to never quit. Rucking with excessive weight helped me feel ready. If you’ve put in the work, the thought of quitting becomes repulsive – even when life gets really tough. You cannot fool yourself and you’ll know if you’ve done all you could.
Other Tips
Rucksack training weight: Do not ever up the weight in your ruck by more than 10 lbs. Meaning, if you ruck with 45 lbs., do not go straight to 65 lbs. Do 55 lbs. first and see how it feels. When in doubt, up the weight gradually and focus on the miles.
Rucking pace: With 55 lbs. and under, 15 minutes per mile is the standard and do not walk slower than that.
Walking vs. Running: do not run with a rucksack. Yes, I’ve done it because I had to to make time hacks. For this, it’s not necessary.
Miles: Running vs. Rucking. I recommend 40 miles/week as your baseline and something you’re comfortable with. If you are getting burned out rucking, trade some rucking miles for running miles. But do not dip below 20 miles rucking/week.
Your ruck: Train like you fight. Get used to how it feels under the weight you have to carry. How the weight distributes over your shoulders matters – you want it to be even. Make sure it feels OK when it’s completely soaking wet. Make sure you add large drain holes to the bottom of your ruck.
Hydration bladders: Two is one and one is none. Make sure to have two just in case – we recommend Source because they’re better built than anything else on the market. Other than making sure you have a ruck that won’t break, this is the most important piece of gear you’ll bring so choose wisely. Carabiner it into the top of your rucksack via the MOLLE webbing so that as you drink the water, it still functions properly. Meaning, when you suck through the tube it pulls water from the bottom of the bladder so you have to let gravity work for you. Do not place your bladder sideways in your ruck.
Socks: I recommend merino wool socks, such as Darn Tough. Do not under any circumstances wear ‘waterproof’ socks. I tried it one time and I’m pretty sure you could still find my blood trails at Camp Mackall.
Shoes: You need support. No milimalist shoes and I recommend light boots. During my training I used jungle boots with drain holes in them and I modified the soles so that they felt more like sneakers. Vibram sole #5 is what I think I told the guy at the shoe shop near Fort Bragg. I loved them and still have them. Key is that you do not want Gore-Tex, your shoes have to drain, and you need support. Moving ~75 miles in two days with wet feet under a lot of weight over uneven terrain creates loads of friction. No matter what boots or shoes you select, make sure to test them out on your feet extensively before you show up. Do not listen to your buddies or a guy who passed or whatever to make the final decision.
Baby powder: Maybe. If you have time to use it, your goal is to give your feet a light dusting and then get as much off as possible. You do not want to put your feet back in your socks if they’re caked in powder. I know because I did it – one time and one time only.
Calories: At least some of the time, ruck with no food and no electrolytes – only water. Put some Gatorade or something in your ruck in case you get light headed. But do not drink it unless absolutely necessary. You have to train yourself to perform without many calories – yes, your body can and will adapt.
Alcohol: I’ve got Irish blood in me and I love beer. But when I was in the Q-Course I almost never went out and I only very occasionally drank even a couple beers. This is not prescriptive for others, it’s just where I was in my life in 2003-06 and achieving goals requires sacrifices.
Blisters: Bring 100mph tape and Vaseline to Selection. If you get a blister, put some Vaseline on top of your blister and cover the hell out of it with 100mph tape. Ensure that the tape has some area to stick around the affected area. If you bring moleskin, that will help but do not use it standalone. It will come off and cause more problems than solutions. You’ll still want to use the Vaseline and the 100mph tape.
Chafing: Ranger Panties make excellent underwear if your thighs typically rub each other when you ruck, but my preferred technique was always commando. To prevent chafing, apply a finger’s worth of Vaseline to the top of your butt crack. As you move around, it makes its way to all the right places. You don’t need all that fancy schmancy $10/bottle stuff. Vaseline works great and when you have a break, re-apply. If you feel any hotspots developing between your legs, apply more directly to the affected area and drive on.
Music: Train without it. You won’t have that stimulus at Selection.
Other GORUCK Events: They’re good confidence builders, especially Heavy. If you really want to do it right, do a Heavy, get your patch, smile with your team, then go for a 20-mile ruck. Do not do this too close to your Selection event because it’ll require some serious recovery. But your mind will be stronger than ever if you exude the confidence and discipline to do more after any of our Events.
Physical Training: Fit in other PT such as what you’ll find on our training blog a couple days a week, but rucking is priority.
Miles: Do them, and lots of them.
In closing: There are no shortcuts. And good luck. I hope you pass and so do all the Cadre and we’re dying to meet the kind of people who earn the Selection patch – to shake their hands and buy them the best tasting beer in the world. Meaning, the one you drink when you finish.
If you have any questions, please post them in the comments section and I’ll do my best.
What is the current SCARS policy on repairing drain holes put in a ruck, as suggested?
Officially, we don’t have to fix drain holes put in by a sew shop/wherever and if they chainsaw the ruck while they’re at it, that’s on you 🙂 Unofficially, we go above and beyond to do right by you. And drain holes are pretty straightforward. It won’t, for instance, void the warranty on the whole ruck or anything. If you need or want them, get them is my advice.
Do you have any events in England? If not, are you aware of any, perhaps with former SAS/SBS, etc?
John, I’m actually headed to London in April to lead a couple. It’ll be a good time, if you like this kind of thing. 🙂
Will there be any events in San Diego? Thanks.
Do you enter as a team? If so how many.
Which rucksack do you see most participants use in the selection event? And have you had better feedback for a particular model?
Hey, first of all awesome article! Trully gold information in there, i just wanted to know, did you run during the big rucking weeks (30miles and more), and if yes, how many miles?